Categories
PHP Programming

PHP Dark Arts: Client-Side PHP

Look, we need to talk about your PHP addiction. I get it – you’ve mastered the server-side arts, bent databases to your will, and perhaps even dabbled in our previous dark art of threading. But something’s missing, isn’t it? You look at those fancy JavaScript developers with their client-side rendering and think “why not PHP?”

Well, my dedicated PHP acolyte, today we’re going to commit what many would consider a cardinal sin: We’re going to run PHP in the browser. Through the forbidden magic of WebAssembly, we’ll make the impossible possible. But first…

⚠️ STANDARD DARK ARTS DISCLAIMER ⚠️
This article is for entertainment and educational purposes only. If you deploy this in production, you will be visited by three ghosts: the Ghost of Bad Architecture Past, the Ghost of Debugging Present, and the Ghost of Maintenance Future. You have been warned.

The Theory of Forbidden Knowledge

Before we dive into our dark ritual, let’s understand what we’re attempting here. WebAssembly (WASM) is a binary instruction format that allows us to run code written in languages like C++ and Rust in the browser at near-native speed. PHP itself is written in C, which means…yes, with the right incantations, we can compile PHP itself to WASM.

The Components of Our Curse

  1. Emscripten – Our magical compiler that will transform PHP into WebAssembly
  2. PHP source code – The victim of our transformation
  3. JavaScript glue code – The unholy binding that will tie it all together
  4. A very specific set of PHP extensions – Because we’re masochists, but not completely insane

Setting Up the Dark Ritual

First, you’ll need to install Emscripten. If you’re on a Unix-like system:

git clone https://github.com/emscripten-core/emsdk.git
cd emsdk
./emsdk install latest
./emsdk activate latest
source ./emsdk_env.sh

Next, we need to get PHP’s source code and prepare it for our dark purposes:

git clone https://github.com/php/php-src.git
cd php-src
git checkout PHP-8.2.0 # Let's use a stable version for our unstable purposes

The Cursed Configuration

Here’s where it gets interesting. We need to configure PHP to be compiled with Emscripten. Create a build script named build-wasm.sh:

#!/bin/bash

emconfigure ./configure \
  --disable-all \
  --disable-cgi \
  --disable-cli \
  --disable-rpath \
  --disable-phpdbg \
  --disable-shared \
  --enable-static \
  --without-pear \
  --without-pcre-jit \
  --with-layout=GNU \
  --enable-embed=static \
  CFLAGS="-O3" \
  LDFLAGS="-O3"

emmake make

The Forbidden Function

Now for the fun part. We’ll create a simple PHP function that we want to run in the browser. Create a file called dark-arts.php:

<?php
function summonDarkPower($input) {
    return "🦇 Behold, client-side PHP has processed: " . $input . " 🦇";
}
?>

The Binding Spell (JavaScript)

We need some JavaScript to bind our PHP WASM module to the browser world. Create dark-binding.js:

let phpModule;

async function initPHP() {
    phpModule = await Module();
    // Initialize PHP WASM environment
    phpModule.ccall('php_embed_init', 'number', ['number', 'number'], [0, 0]);
}

async function runPHP(input) {
    if (!phpModule) await initPHP();

    // Allocate memory for our input string
    const inputPtr = phpModule.allocate(
        phpModule.intArrayFromString(input),
        phpModule.ALLOC_NORMAL
    );

    // Create our PHP code string
    const phpCode = `<?php 
        include 'dark-arts.php';
        echo summonDarkPower('${input}');
    ?>`;

    const codePtr = phpModule.allocate(
        phpModule.intArrayFromString(phpCode),
        phpModule.ALLOC_NORMAL
    );

    // Execute PHP code
    const result = phpModule.ccall(
        'zend_eval_string',
        'number',
        ['string', 'string', 'string'],
        [phpCode, 'dark-arts', '1']
    );

    // Clean up
    phpModule._free(inputPtr);
    phpModule._free(codePtr);

    return result;
}

The Final Incantation

Now, let’s put it all together in an HTML file that summons our dark creation:

<!DOCTYPE html>
<html>
<head>
    <title>PHP Dark Arts: Client-Side Edition</title>
    <style>
        body {
            background: #1a1a1a;
            color: #00ff00;
            font-family: monospace;
        }
        #output {
            border: 1px solid #00ff00;
            padding: 20px;
            margin: 20px;
            min-height: 100px;
        }
    </style>
</head>
<body>
    <h1>🕯️ PHP Dark Arts Console 🕯️</h1>
    <input type="text" id="input" placeholder="Enter text to process...">
    <button onclick="performRitual()">Summon</button>
    <div id="output"></div>

    <script src="php-wasm.js"></script>
    <script src="dark-binding.js"></script>
    <script>
        async function performRitual() {
            const input = document.getElementById('input').value;
            const output = document.getElementById('output');
            try {
                const result = await runPHP(input);
                output.innerHTML += `<div>${result}</div>`;
            } catch (e) {
                output.innerHTML += `<div style="color: red">The ritual failed: ${e}</div>`;
            }
        }
    </script>
</body>
</html>

Running Our Creation

To witness this abomination in action:

  1. Compile everything with Emscripten:
emcc -o php-wasm.js php-src/sapi/embed/php_embed.c \
    php-src/.libs/libphp.a \
    -s WASM=1 \
    -s EXPORTED_FUNCTIONS='["_php_embed_init", "_zend_eval_string"]' \
    -s EXPORTED_RUNTIME_METHODS='["ccall", "allocate", "intArrayFromString", "ALLOC_NORMAL"]' \
    -s INITIAL_MEMORY=33554432
  1. Serve it with your favorite local web server:
php -S localhost:8080
  1. Open your browser and behold your creation at http://localhost:8080

The Results

If everything went according to plan (ha!), you should now have a working example of PHP running in your browser. Type something into the input box, click “Summon,” and watch as your text is processed by actual PHP code running in WebAssembly.

But Why Though?

Look, we’ve done something impressive here. We’ve taken PHP, a language designed to generate HTML on the server, and forced it to run in the browser through sheer willpower and questionable decision-making. Is it practical? Absolutely not. Is it cool? Debatable. Will it make senior developers cry? Absolutely.

Potential “Uses” (Air Quotes Heavily Implied)

  1. Running legacy PHP code in the browser when migrating to a modern frontend framework
  2. Making your website completely incomprehensible to future maintainers
  3. Winning bets about what’s possible with PHP
  4. Getting fired in a particularly memorable way

Next Time…

In our next installment of PHP Dark Arts, we’ll explore creating a blockchain implementation entirely in PHP using nothing but arrays and regret. Until then, keep your code dark and your intentions questionable!
Categories
PHP Programming Wordpress Development

Kernl Goes Beta!

Screen Shot 2015-11-22 at 3.02.31 PM

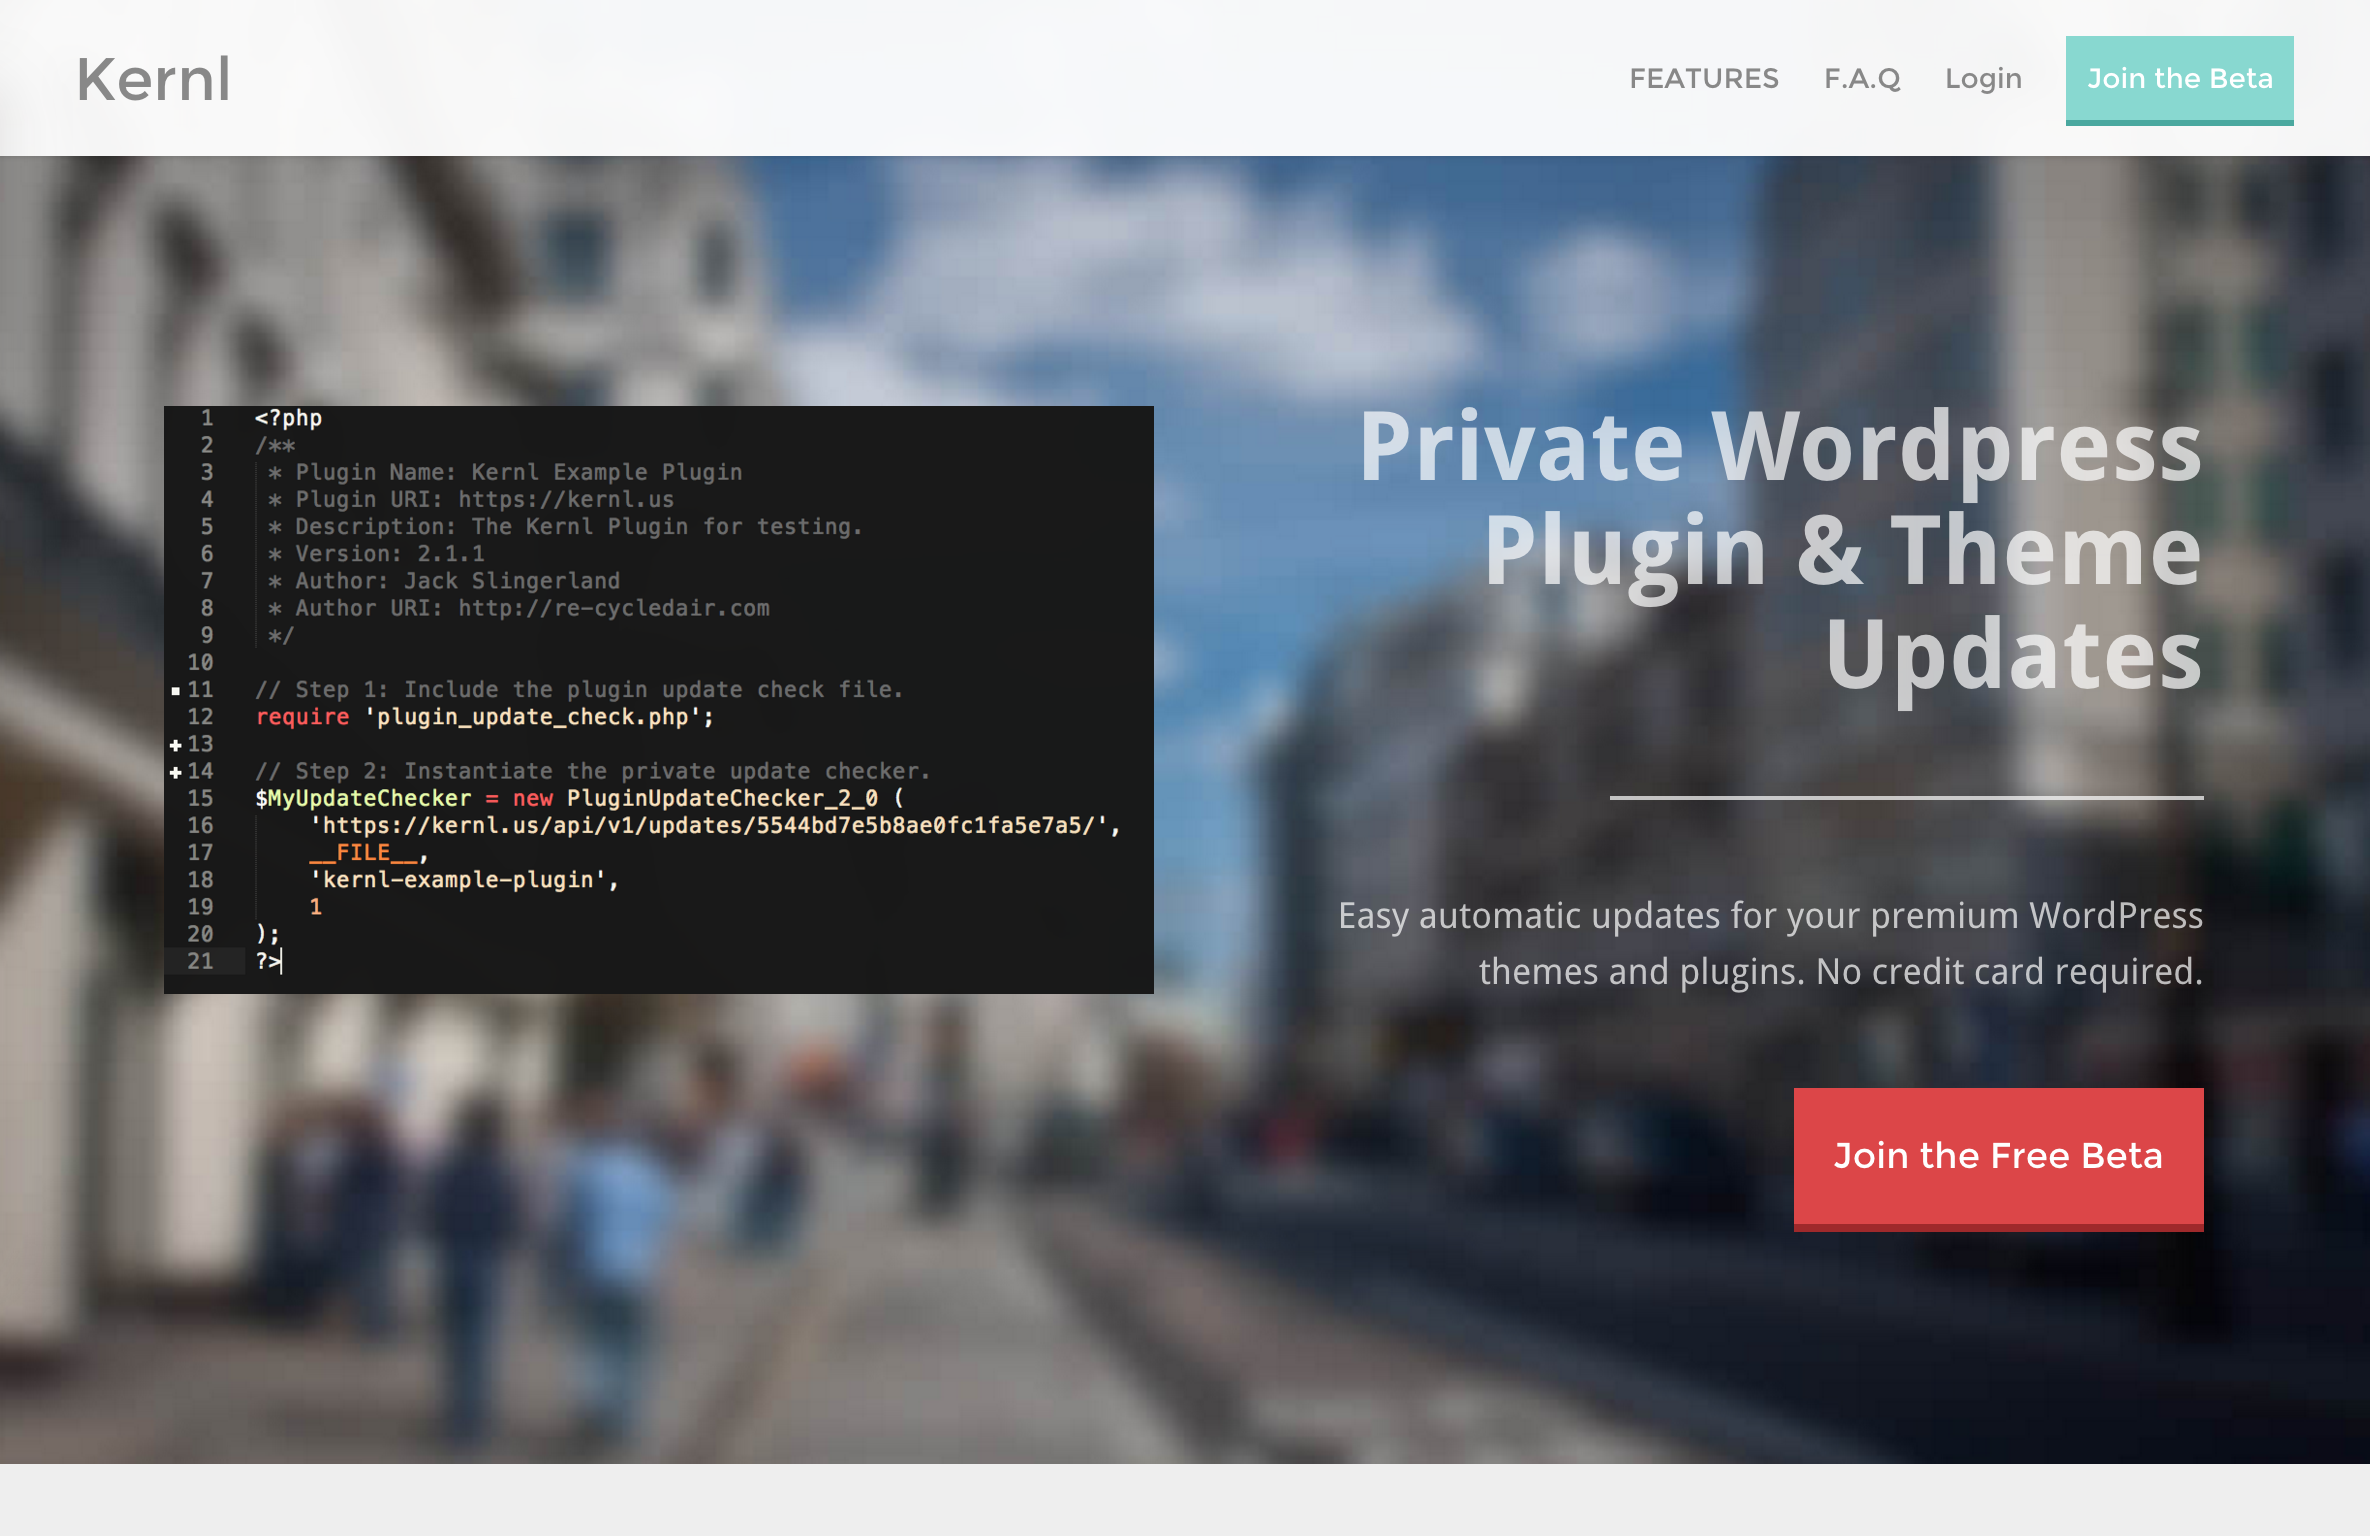
In May of this year I launched the Kernl alpha with hopes that WordPress developers would be interested in it.  And interested they were!  6 months later Kernl has over 65 users from all around the globe and a host of new capabilities to make WordPress plugin and theme development easier.  For instance, since launch we’ve added:

  • Continuous Integration with BitBucket
  • Continuous Integration with GitHub
  • Purchase Code Validation

But new features aren’t all that make a service great.  For people to trust in something it must be reliable, and thats what the beta phase of Kernl is all about: improving reliability.  We’ve reached a point where we feel Kernl provides enough value to the WordPress community to allow us to take some time to refactor code and add a lot more tests.

What does this mean for you?  Not much.  If we do our job right you won’t notice anything.  The beta is still free and everyone will get big “heads up” before we start charging for the service.

Thank you to all of the alpha users who have made this possible.  Without you Kernl wouldn’t be where it is today.


Categories
PHP Programming Wordpress Development

Continuous Deployment of WordPress Plugins Using Kernl

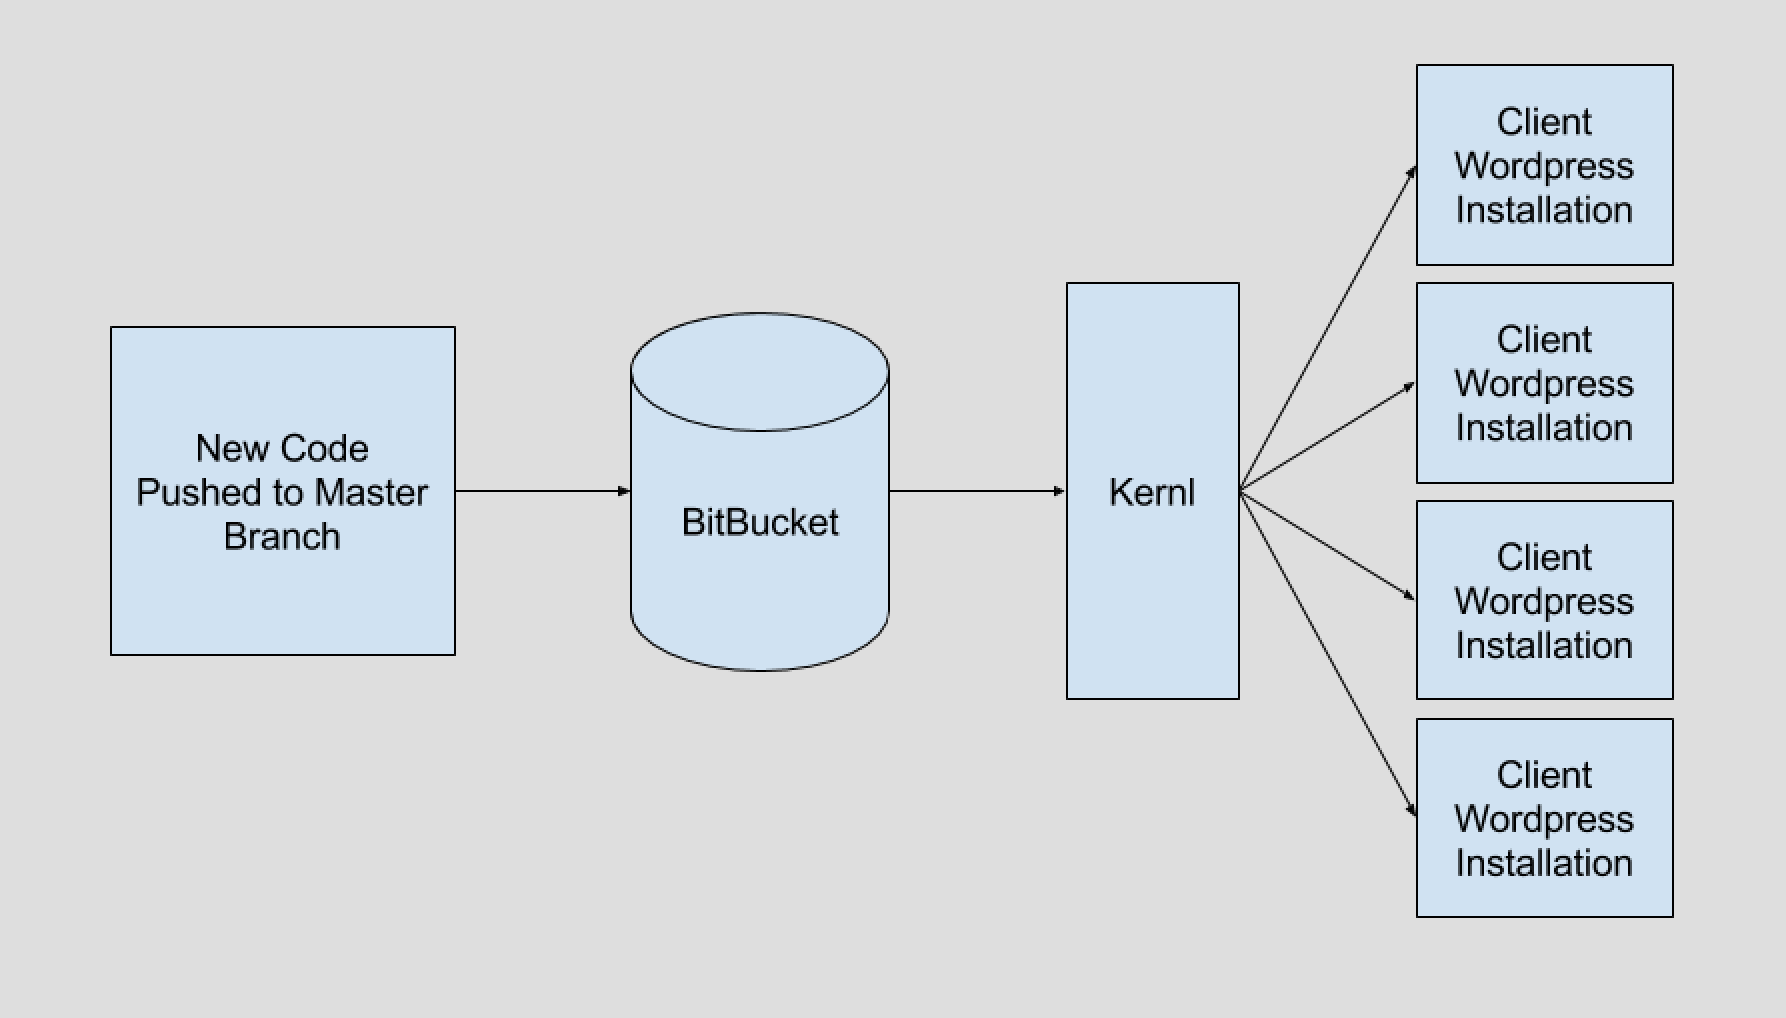
One of the problems I’ve always had with WordPress plugin development is doing it in a modern build pipeline. I really wanted to be able to merge a branch into master, build the zip file, and push the update out to my clients. For the longest time I wasn’t able to do this, so I built Kernl to enable a more modern development approach to WordPress plugin development.

What is Continuous Deployment?

Continuous Deployment (or Continuous Delivery) is a software development strategy where you ship code frequently. Your pipeline is fully automated, so as soon as some event on your version control repository is triggered the deploy process starts. For me, that event is when I merge a pull request into master.

What is Kernl

Kernl started out as a way to provide private plugin and theme updates for WordPress, which grew out of my frustration at having to update clients manually every time a small bug was patched. Once I had the updates working manually, the next step was automating everything. This is where “push to build” came in.

How Push To Build Works

Getting Started with Kernl

Getting push-to-build updates on your plugin or theme is pretty easy to set up with Kernl.

  1. Go to https://kernl.us and sign up. After you’ve logged in, click “Continuous Integration”.
  2. Now connect BitBucket.  This will authorize Kernl to access your BitBucket account so that it can enable push-to-build functionality.
  3. The next step is adding a WebHook to BitBucket.  This tells BitBucket to send a message to Kernl after every code push.  To do this, go to your repository settings, scroll down to “Integrations” and click “WebHooks”.  Set the new Webhook to point at https://kernl.us/api/v1/repositories/bitbucket/webhook.
  4. In order for Kernl to know when to build a new version of your plugin, it looks for a file named kernl.version in the root directory of your repository.  Go ahead and add this file now and commit it.  The kernl.version should contain a semantic version that looks like “1.0.1”.
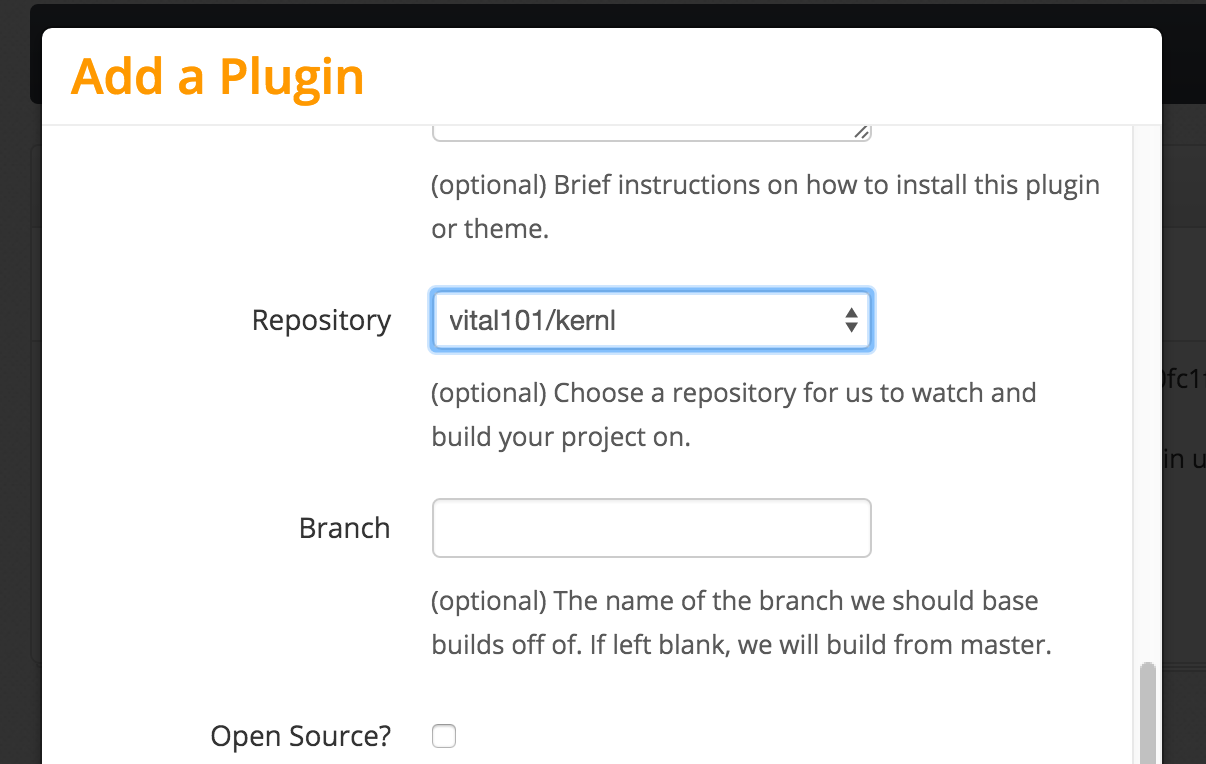
  5. Next, you need to add a plugin.  In Kernl, click “Plugins” on the left and then click “Add Plugin” on the upper-right.  Fill out the name, slug, and description fields, then scroll to the bottom.Kernl Select Repository and Branch You should now be able to select from a list of repositories from your BitBucket account.  You can also choose what branch Kernl should make its builds from.  The default is master, but it can be anything that you want.  Select a repository now and press “Save”.
  6. Next, you need to add the first version to Kernl manually.  Click the “versions” button for the plugin you just created, and then click “Add Version”.  The most important part of the process here is to make sure that the version number in Kernl, kernl.version, and your plugin match.  If you put 1.0.0 in the kernl.version file, make sure that it matches in your plugin’s main file, as well as in Kernl when you upload the first version.  If this still isn’t clear, check out the example plugin on BitBucket.  The kernl.version should contain one line, and on that line will be your version.  Once you have the versions figured out, zip up the plugin as if you were going to distribute it and upload it to Kernl.
  7. Thats it!  Distribute this copy of the plugin to your clients and they’ll receive private updates whenever you upload a new copy or push a new version to your BitBucket repository.

Pushing a New Version

With all the boilerplate setup complete, getting a new update out to your clients is super easy.  Follow the steps below and you’ll be good to go.

  1. Make code changes.  Whatever change you want to push out, go ahead and make it.
  2. Update your plugin’s version.  This is typically in the comment document block in your functions.php file.
  3. Update the kernl.version file.  This should match your functions.php version.
  4. Commit
  5. Push to the branch you specified in your plugin setup on Kernl.  If you didn’t specify a branch, that means you’ll need to push to master.
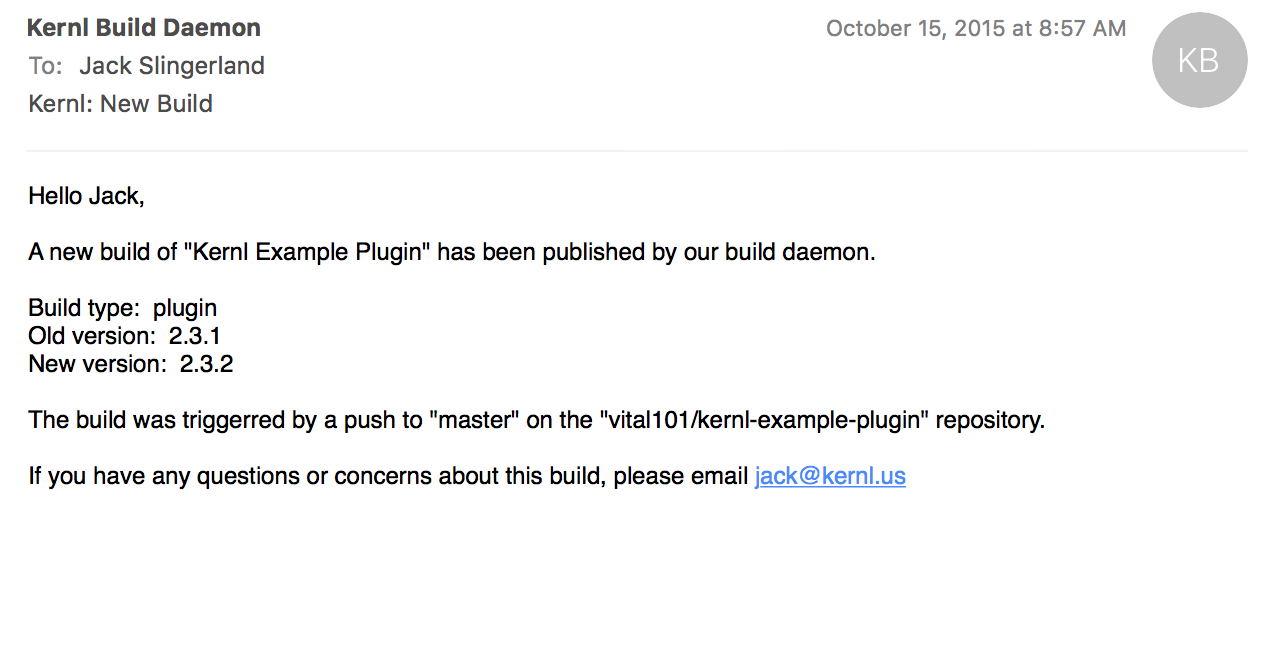
  6. Done.  If all went well, you’ll receive an email from Kernl that lets you know about the new version that was pushed.  You can also verify that the plugin was built by visiting Kernl and looking in the version list for your plugin.

Plugin build email

If you’ve ever wanted to modernize your WordPress development pipeline, I highly suggest you check out Kernl.  Automatic updates triggered by changes in your repository will save you tons of time and get bug fixes and updates out to your clients faster.

Categories
Wordpress Development

A Case for WordPress

I recently made the case for using the open-source WordPress CMS instead of a custom hand-rolled CMS to a manager. What follows is the email (with names and companies changed) that was sent. I thought that it might be useful to other people who are trying to convince their organization to take the leap to WordPress, Drupal, or any other open-source CMS. It’s also worth noting that I’m on very friendly terms with my manager, hence the informality and straight-forwardness. As for the Django references, we develop most of our data-driven sites in Python/Django.

Hey [Manager],

As you already know, I completely loathe the [Custom] CMS. My recent and ongoing experiences with the [Client] website have only served to reinforce these feelings. Unbridled hate rarely serves any useful purpose though, so I’ve decided to see what I can do to make the problem better. My way of doing that is by making a case for using WordPress on large, non-trivial, content driven websites. As of right now WordPress has been lasso’d into small-size websites at [Company], but I believe it is capable of far more then that. What follows is a breakdown of all the feedback, questions, and concerns that were raised while I was gathering information. I’ve provided solutions to almost all of the problems, and its worth noting that some of the problems with WordPress are not unique to WordPress. I also want to make it clear that I’m not trying to get rid of the [Custom] CMS, especially since we have a lot of clients with a lot of money invested in it. I’m simply making a case for using WordPress on large sites instead of the [Custom] CMS.

Content Creation / Management

For as long as I can remember, [Other Manager] always raised a red flag with WordPress because it was inferior in content creation to the CMS. In vanilla form this is arguably true, however WordPress has an amazing community of plugin developers surrounding it who have solved all of these problems.

  • Pods – I have a love-hate relationship with pods. I like that they provide nearly infinite flexibility to the content creator, but that comes with the price of nearly infinite complexity. While I disagree with giving the content-creator that much control over how content is displayed, I can see the usefulness of it. To solve that problem, there are many visual composition plugins available for WordPress. My favorite is Visual Composer (http://vc.wpbakery.com/). Extending Visual Composer (akin to adding “module functions”) is as simple as adding a hook in your WordPress widget.
  • Categories / Taxonomies for Media (assets) – WordPress has brilliant support for categories and custom taxonomies out of the box. Beyond that, it also has support for tags. One thing that doesn’t work out of the box is media categories. Luckily there is a large handful of community plugins that easily solve this problem for us.
  • Media – The media library in WordPress is extremely slick, ajax-y (asynchronous uploads, etc), and easily extendable. Multiple thumbnails and image sizes are generated out of the box. Adding new image sizes is easy too.
  • Videos – WordPress supports videos out of the box. Adding Youtube/Hulu/Vimeo videos is as easy as adding one of the numerous plugins. There are even plugins out there that interface with FFMPEG to get you a nice selection of thumbnails to choose from.
  • Form Builder – The new hotness of [Custom] CMS is Form Builder. WordPress has a large amount of awesome form builders available, and most of them are cheap and come with support. Gravity Forms(http://www.gravityforms.com) is my favorite. Although Ninja forms is looking like a valid alternative.
  • User Management – WordPress comes with excellent user management out of the box. It has 4 default roles (Administrator, Editor, Contributor, Subscriber), but no way to change what those roles are capable of. They generally have pretty sane defaults, but sometimes you want to tweak things. User Role Editor(http://wordpress.org/plugins/user-role-editor) provides an easy way to modify group and user permissions. If you need to add new roles, there are plugins for that as well.
  • Content Deployment – We’ve often struggled with how to deploy new content to sites. Generally you don’t want to create the content on live, because it will need to be hidden. There is a straight ballin’ plugin for WordPress called Ramp(http://crowdfavorite.com/wordpress/ramp/) that solves this problem. Seriously, check this out. It will blow your mind.

General Notes

I have a handful of notes that don’t fit well into Content Creation / Management or Development, so here we go.

  • Update Cycle – WordPress has a release cycle (http://en.wikipedia.org/wiki/WordPress#Releases). It has feature releases, bug releases, and HOLY HELL THATS A BIG RELEASE releases. WordPress updates are vetted by an insanely large community of professional developers who catch bugs/regressions and fix them before release.
  • CMS “Upgrades” – Somehow its become normal and accepted at [Company] that a CMS Upgrade costs north of $25,000, takes a month, and almost always ends up braking some part of the site that wasn’t broken before. WordPress upgrades take 10 seconds, don’t break changes, and have deprecation warnings just in case you’re using a method/hook that won’t be supported in a future release. We might make some money off of [Custom] CMS upgrades, but my experience has been that they end up costing more time/effort/good will then they are worth. Having a one-click upgrade option allows us to keep our sites secure, up to date, and gets us back to making things awesome.
  • Community – WordPress.org has 1,998 base themes that can be used and extended via theme inheritance. It also has over 26,000 plugins that extend WordPress’ functionality. This doesn’t account for the numerous premium plugins that are available throughout the internet. Help is always just a Google search away. If that doesn’t work, Stack Overflow most certainly will. Having the backing of a community while you are developing is invaluable. Did I mention the WordPress IRC channel?
  • Documentation – One of the most frustrating things about the [Custom] CMS isn’t the lack of code documentation, but the lack of code usage documentation. WordPress has a ludicrous amount of documentation on pretty much anything you can think of. It stays up to date with best practices and is updated for every release. If the WordPress.org documentation isn’t good enough, the source code is very well documented. If the source doesn’t suit your fancy, there is probably a blogger that wrote about your problem.
  • Hiring – Hiring is hard in this economic climate. Selling a PHP developer to come work for [Company] with [Custom] CMS is even harder. If the person is a WordPress expert, all of that domain knowledge stagnates and becomes useless here. It also makes the on-boarding process take 2-4 months. And even then, they still aren’t all that useful in the [Custom] CMS. Having WordPress as a core tool allows us to hire people who are already experts. The on-boarding becomes a few weeks, and everyone is happy. It also makes it a lot less fatal if we lose a developer, because it’s possible to hire another one that already has all the domain knowledge.
  • Focus – Using WordPress is similar to using Django in that it gets out of your way at lets you focus on what’s important: making awesome stuff. You don’t have to piddle around with random regressions, bugs, or odds and ends. Those are already worked out for you. You get to focus on making custom functionality the best you can. Not having to mess around with bugs and regressions allows you to focus on quality instead of just “getting it done”.
  • Security – WordPress can be a security nightmare. With an install footprint of over 60 million websites (as of 2012), everybody is trying to hack it. Luckily most plugin authors and the WordPress security team are always right on top of it. There is a plugin called WP Security Scan(http://wordpress.org/plugins/wp-security-scan/) that takes care of making sure all the directories have the proper permissions, and in general gives good advice to harden your WordPress installation. Taking 10 minutes a week to update all your WordPress sites is also the best way to prevent security issues.
  • Who? – WordPress.com has a nice list of notable WordPress users (http://en.wordpress.com/notable-users/). The list includes, CNN, NYTimes, Forbes, Reuters, Sony, Jay-Z, Rolling Stones, GM, and others.
  • Cost – We keep upgrading the CMS. It needs it, but it cost lots of money. WordPress and the open-source community keep things up-to-date for us, so the cost is nil.

Development

In the past, a lot of misinformation has been spread about WordPress and how developing with it is awful. A lot of that comes from lack of knowledge, so I thought I’d address a lot of the pain points that people have experienced.

  • Plugin Creation – [Other developer] brought up the point that WordPress plugins are created in a procedural fashion, and are therefore a huge PITA to work with. As it turns out, the correct way to make WordPress plugins is via OOP. This NetTuts tutorial covers most of the basics (http://net.tutsplus.com/tutorials/wordpress/create-wordpress-plugins-with-oop-techniques/).
  • Content Deployment – WordPress hard-codes URLs into the database content. This is obviously a bad idea for many reasons. To rectify, if you move content from one server to another, you just need to execute 3 sql queries as part of your deployment. Usage of Ramp (mentioned above) solves this issue for 99% of use cases.
  • Versioning – WordPress shouldn’t be versioned. Any plugin you install from WordPress.org should not be versioned. If you are making a custom theme, that should get it’s own repository (hey, look at Stash and all it’s repos we can create). If you are making a custom plugin, that should also get it’s own repo. This promotes re-usability and good coding practices. Deployment of theme/plugin updates is as easy as checking out the latest version or git-pulling.
  • Deployment – Initial deployment of a WordPress site is just like moving a staging site to the live server for the [Custom] CMS. After that, deploying code updates to custom plugins and themes is just a git pull/checkout of a tag. This could easily be streamlined with the use of Fabric or Capistrano.
  • Modules / Custom Post Types – The [Custom] CMS has a pretty nice way of creating basic custom content via modules and the scaffolding. WordPress has custom post types, and several different plugins for creating them on the fly. My current favorite is Advanced Custom Fields (http://www.advancedcustomfields.com/)
  • Theme Inheritance – As mentioned before, WordPress has LOTS of themes. Nearly any one of them can be used as a base theme, saving front-enders a ton of time getting base CSS and templates set up.
  • ORM – WordPress has a weak ORM. Hopefully you can use WordPress’ features enough that you can write minimal SQL. On the bright side, you’ll have some nicely optimized queries 😉 This is also why you should use the right tool for the job. If you have to interact with the database so much that you need an ORM, you should probably be using a framework.
  • Testing – WordPress core is fully unit and integration tested. The majority of premium plugins and popular plugins are tested as well. Plugins can easily be tested using PHPUnit, and their interfaces can be tested using Behat.
  • Developing as a Team – WIth a sane Git strategy (custom plugins and themes versioned only) developing as a team is a non-issue. In the past, having the whole project under version control caused serious issues when there was more then one developer.
  • Database Migrations – Just as with [Custom] CMS, if you have complex migration that destroys data you’ll need to handle the migration yourself. http://codex.wordpress.org/Creating_Tables_with_Plugins has more info. If the migration isn’t destructive, you can use the wp_delta method to handle it for you.
  • Environment Abstraction – WordPress does a great job of not caring about what version of PHP you’re on. So long as you are PHP >= 5.2.4 and MySQL >= 5.0.0, you’re all set

I know we’ve talked in the past about vetting a Django CMS, but I think that using WordPress is the best choice. We already have people who know it, the front-enders know how to develop for it, the community is massive, and learning it is easy. I look forward to talking with you about this.

Categories
PHP Programming

PHP Dark Arts: References

Remember the first time you dabbled in C?  Oh, the glorious typing, functions, and structs!  Now do you remember the first time you ran in to a pointer?  ‘*’, ‘&’, ‘->’ all made your hurt, but eventually you figured it out.  It’s fortunate (depending how you look at it) that we don’t have need to dabble with pointers or references while web programming these days.  However, PHP does allow us to passing things around by reference.  It’s not used often, but when used correctly can be very beneficial to the quality of your code.

What are PHP references?

The first thing you need to know about PHP references is that they are not C references.  You can’t do pointer arithmetic on them because they aren’t actually addresses.  In PHP references are actually symbol table aliases.  This means that you can have 2 variable names sharing the same variable content.

What can you do with references?

There are 3 things that you can do with PHP references.

  • Assign by reference.
  • Pass by reference.
  • Return by reference.
$x =& $y;
$x = 3;
echo "X: $x, Y: $y";

The above code sets $x and $y’s references to the same content area. Therefore, when $x is assigned 3, $y has access to the same data.

function add_item(&$item) {
   	$item++;
}
 
$totalItems = 0;
for($i = 0; $i <; 5; $i++) {
	add_item($totalItems);
}
echo "Total items: $totalItems";

This code allows you to modify a variable’s value without ever returning anything. In this example I made a simple counter, but you can set the value of $item to anything and it should work out just fine.

class Test {
	public $count = 0;
 
	public function &getCount() {
		return $this->count;
	}
}
 
$t = new Test();
$value = &$t->getCount();
$t->count = 25;
echo $value;

This code returns a reference to the public $count variable of the Test class. Generally this isn’t best practice, as it lowers the readability of the code.

Unsetting References

In the event that you want to free a variable from it’s reference to another, you can simply use the unset function.

$x =& $y;
unset($x);
Categories
Other Programming PHP Programming

HTML 5 Canvas: Saving to a File with PHP

So you’ve finally discovered the wonder that is the HTML5 Canvas element. Great! If you’re like me, the first thing I wanted to do with it was doodle on it. I eventually worked out how to map touch/mouse events to the canvas and draw lines, but I wanted to save my creations!

As it turns out, the Canvas element has a method called toDataURL(), which base64 encodes the entire Canvas element and returns it as a string. From there, you can just pump it over to a server and handle it from there. Here’s the step-by-step, which assumes you are also running jQuery on your site.

Step 1: Save the canvas and POST the data

var data = document.getElementById("myCanvasID").toDataURL();
$.post("process.php", {
	imageData : data
}, function(data) {
	window.location = data;
});

Step 2: Process the POST data, and save it to a file.

$data = substr($_POST['imageData'], strpos($_POST['imageData'], ",") + 1);
$decodedData = base64_decode($data);
$fp = fopen("canvas.png", 'wb');
fwrite($fp, $decodedData);
fclose();
echo "/canvas.png";

Note: The first line of this script removes the header information that is sent with the encoded data.

Thats all there is to it. You can now easily save your HTML 5 awesomeness.

Categories
PHP Programming Wordpress Development

Caching WordPress Data with the Transients API

If you’re a plugin or theme developer, there may come a time when you need to execute a long running operation. It doesn’t need to be anything complicated, but something as simple as fetching a Twitter feed can take a significant amount of time. When you come across these types of situations, it’s handy to be able to store the data on your own server and then fetch a new copy of it every X hours. This is called caching, and WordPress convieniently comes packages with an excellent caching API called Transients .
Wordpress Transients API

The Transients API is surprisingly simple to use. In fact, it’s very much like using set_option and get_option except with an expiration time. If you aren’t familiar with caching at all, here’s the general workflow:

  1. If the data exists in the cache and isn’t expired, get it.
  2. If the data doesn’t exist in the cache or is expired, perform the necessary actions to get the data.
  3. Store the data in the cache if it doesn’t already exist or is expired.
  4. Continue from here using data.

When attempting to use the Transients API for caching, there are three functions that you need to be aware of: set_transient, get_transient, and delete_transient.

  • set_transient($identifier, $data, $expiration_in_minutes): This function stores your data into the database. The identifier is a string that uniquely identifies your data. Your data can be any sort of complex object, so long as it is serializable. The expiration is how long your want your data to be valid (ex: 12 hours would be 60*60*12).
  • get_transient($identifier): This retrieves your data. If the data doesn’t exist or the expiration time has passed, false is returned. Otherwise, the same data you stored will be returned.
  • delete_transient($identifier): This will delete your data before it’s expiration time. This is handy if you are storing post-dependent data because you can hook it into the save action so that every time you save a post, your cached data is cleared.

Now that we’ve covered the basics, how about a quick example?

if (false === ( $my_data = get_transient('super_expensive_operation_data') ) ) {
     $my_data = do_stuff();
     set_transient('super_expensive_operation_data', $my_data, 60*60*12);
}
 
echo $my_data;
 
function do_stuff() {
     $x = 0;
     for($i = 0; $i != 999999999; $i++) {
          $x = $x * $i;
     }
     return $x;
}

The example is pretty straight forward. We first check to see if there is a cached copy of the data, if not, we fetch the data from the “do_stuff” function, and store it in the database. Simple, right?

One of the benefits of using the Transients API (aside from speeding your site up) is that plugins like WP Super Cache or WP Total Cache will auto-magically cache your data into memcached if you have it set up. For you, this means an even faster site! If you have any questions about caching techniques or the Transients API, leave a comment and I’d be happy to help.

Categories
PHP Programming

Tracking Email Open Time with PHP

You can download my code for this article here.
Some time ago I had great aspirations of launching a web company that does email tracking and analytics. One of the things that I really wanted to figure out but wasn’t well documented on the web was how to track how long a user had a particular email open. When a company like MailChimp wants to track emails that they are sending out, they put a small image in the email called a “beacon”. When the user opens the email, the beacon image is requested from the server. The server sends the image, but not before it gathers information about the computer requesting it. The works great for checking if an email was opened, or what platform the person is on, but it doesn’t work at all for determining how long the email was open for.

One option that came to mind for checking the open time of an email was long polling.  Long polling (in this case) would use Javascript to contact the server every X seconds after the email was loaded.  Using those requests, it’d be trivial to find out how long it was open for.  Unfortunately, most (if not all) email clients don’t allow the execution of Javascript within emails, so that idea was completely sank.  The only option I had left was to use the beacon image to somehow determine open time.

The only option I could think of for using the image beacon without any Javascript was to redirect the image back to itself.  After much trial and error, I came up with the following.

//Open the file, and send to user.
$fileName = "../img/beacon.gif";
$fp = fopen($fileName, "r");
header("Content-type: image/gif");
while(!feof($fp)) {
    //Do a redirect for the timing.?
    sleep(2);
    if(isset($_GET['clientID'])) {
    	$redirect = $_SERVER['REQUEST_URI'];
    } else {
    	$redirect = $_SERVER['REQUEST_URI'] . "?clientID=" . $clientID;
    }
    header("Location: $redirect");
}

So what’s happening in this code?  First of all, we’re opening a small GIF file that we’re going to pretend to send to the user.  The second step is to send a header for an image file to the user so that their mail client expects one to be delivered.  This step is important because if the header isn’t sent, the browser/mail client will close the connection.  After that, you make the request sleep for a few seconds (as few or as many as you want depending on how granular you want your timing data to be) and then redirect back to the same page.  The “if” statement within the while loop is there so you can identify incoming requests and log the data accordingly.

So there you have it.  If you’ve ever wondered how people track the open time of an email, it’s probably a method very similar to this.  The only caveat to this method is that it relies on the user loading images in an email.  However, if you have a large enough sample you can just take the average open time from the users that did open it and be fairly confident with that.

Note: There has been some discussion over on Stack Overflow about this article. You may find it helpful.


If you liked this article, then you may like:

  • PHP Dark Arts: Multi-Processing (Part 1)
  • PHP Dark Arts: Multi-Processing (Part 2)
  • PHP Dark Arts: Shared Memory Segments (IPC)
  • PHP Dark Arts: Semaphores
  • PHP Dark Arts: GUI Programming with GTK
  • PHP Dark Arts: Sockets
  • PHP Dark Arts: Daemonizing a Process