One of the problems I’ve always had with WordPress plugin development is doing it in a modern build pipeline. I really wanted to be able to merge a branch into master, build the zip file, and push the update out to my clients. For the longest time I wasn’t able to do this, so I built Kernl to enable a more modern development approach to WordPress plugin development.
What is Continuous Deployment?
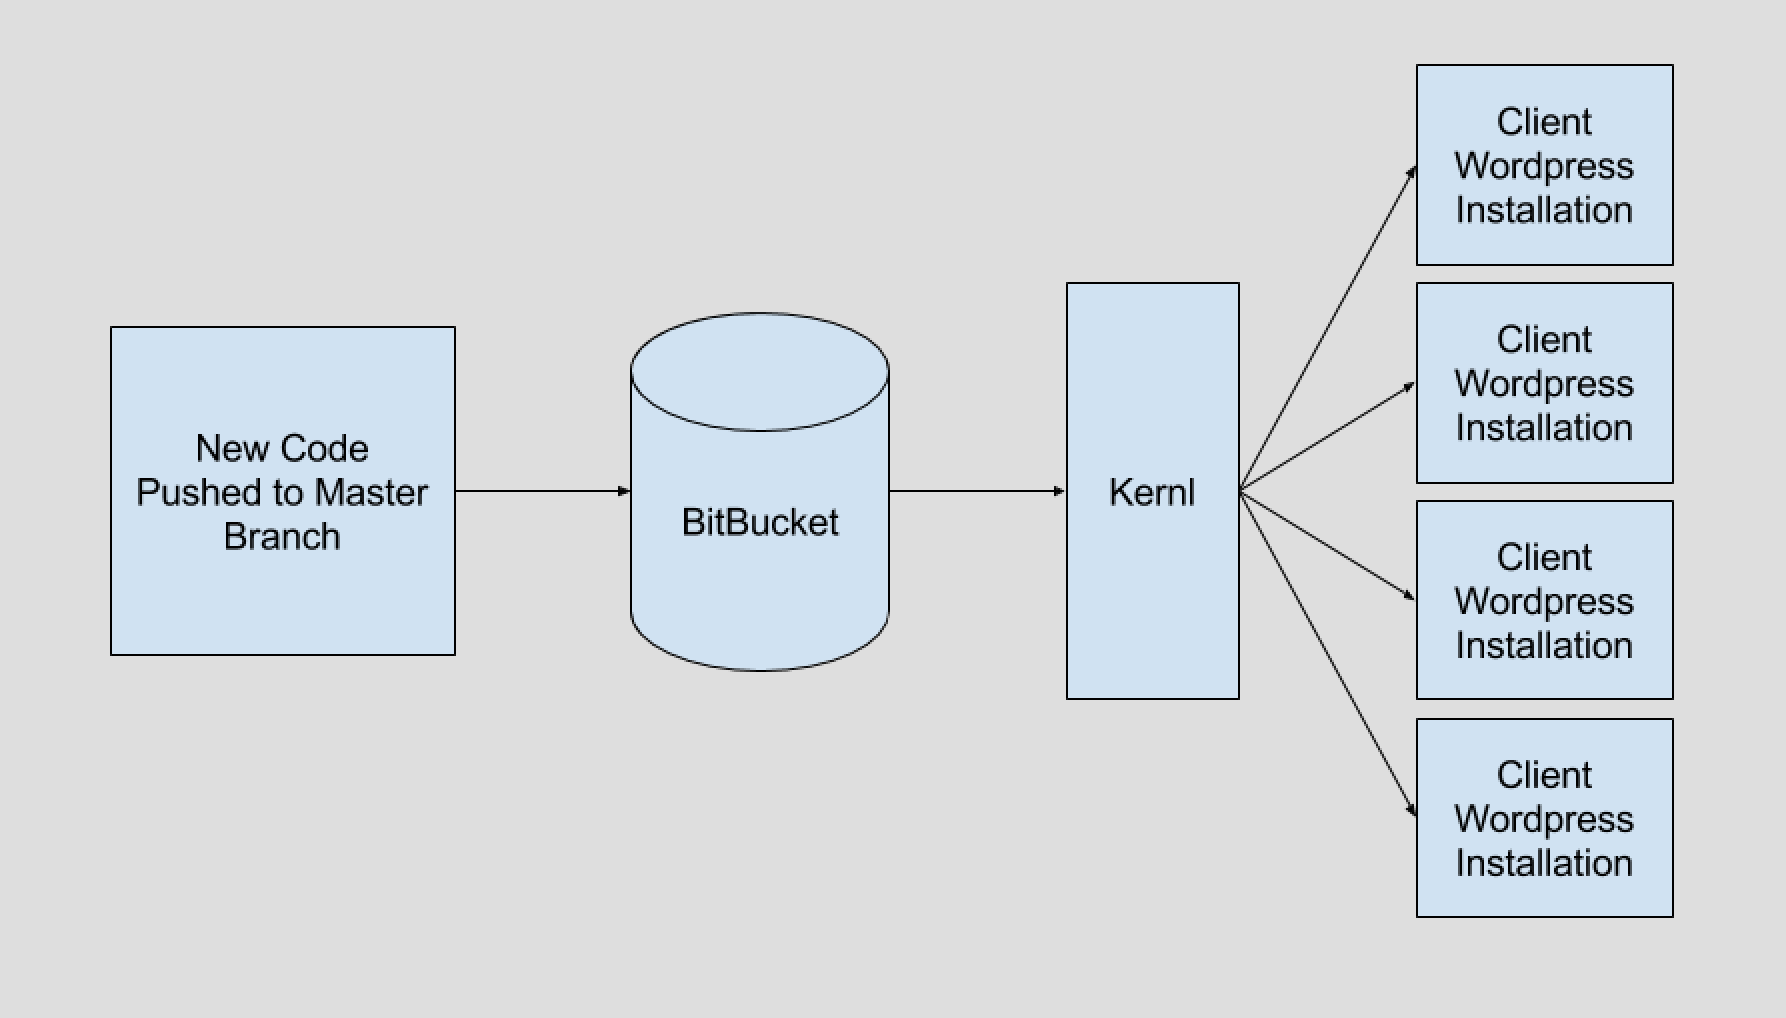
Continuous Deployment (or Continuous Delivery) is a software development strategy where you ship code frequently. Your pipeline is fully automated, so as soon as some event on your version control repository is triggered the deploy process starts. For me, that event is when I merge a pull request into master.
What is Kernl
Kernl started out as a way to provide private plugin and theme updates for WordPress, which grew out of my frustration at having to update clients manually every time a small bug was patched. Once I had the updates working manually, the next step was automating everything. This is where “push to build” came in.
Getting Started with Kernl
Getting push-to-build updates on your plugin or theme is pretty easy to set up with Kernl.
- Go to https://kernl.us and sign up. After you’ve logged in, click “Continuous Integration”.
- Now connect BitBucket. This will authorize Kernl to access your BitBucket account so that it can enable push-to-build functionality.
- The next step is adding a WebHook to BitBucket. This tells BitBucket to send a message to Kernl after every code push. To do this, go to your repository settings, scroll down to “Integrations” and click “WebHooks”. Set the new Webhook to point at https://kernl.us/api/v1/repositories/bitbucket/webhook.
- In order for Kernl to know when to build a new version of your plugin, it looks for a file named kernl.version in the root directory of your repository. Go ahead and add this file now and commit it. The kernl.version should contain a semantic version that looks like “1.0.1”.
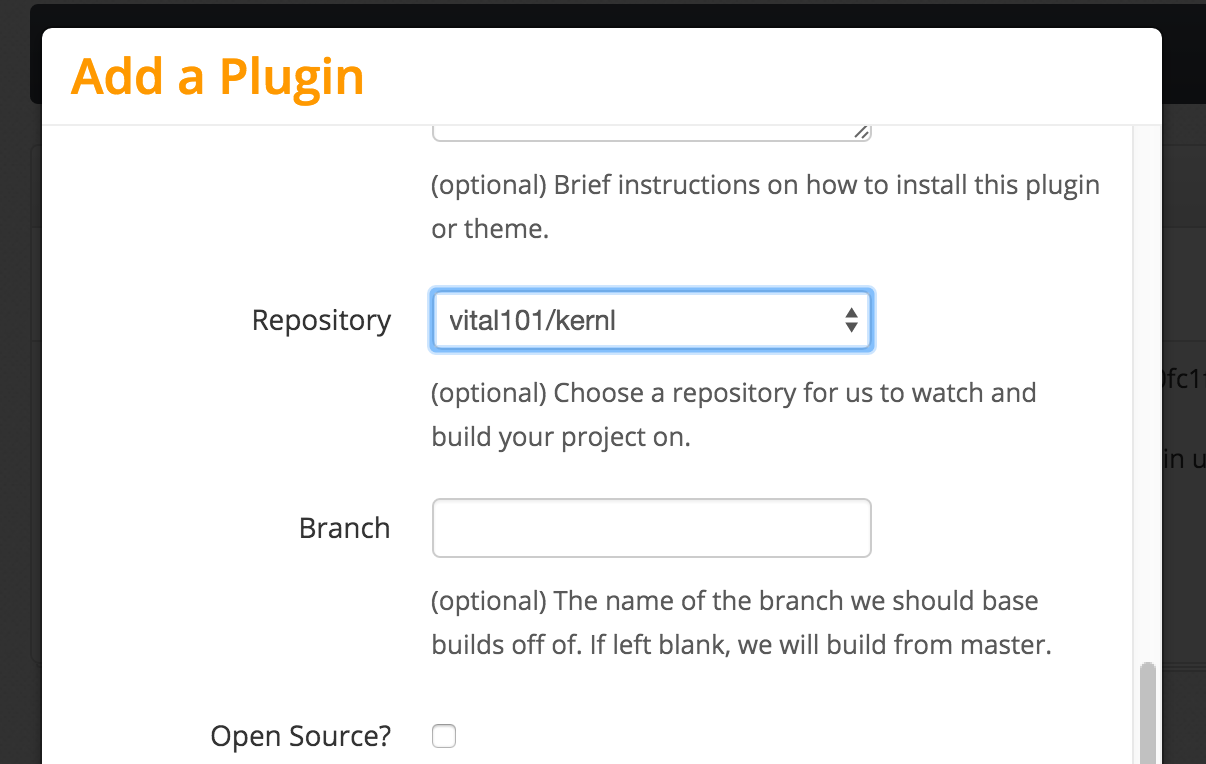
- Next, you need to add a plugin. In Kernl, click “Plugins” on the left and then click “Add Plugin” on the upper-right. Fill out the name, slug, and description fields, then scroll to the bottom.
 You should now be able to select from a list of repositories from your BitBucket account. You can also choose what branch Kernl should make its builds from. The default is master, but it can be anything that you want. Select a repository now and press “Save”.
 - Next, you need to add the first version to Kernl manually. Click the “versions” button for the plugin you just created, and then click “Add Version”. The most important part of the process here is to make sure that the version number in Kernl, kernl.version, and your plugin match. If you put 1.0.0 in the kernl.version file, make sure that it matches in your plugin’s main file, as well as in Kernl when you upload the first version. If this still isn’t clear, check out the example plugin on BitBucket. The kernl.version should contain one line, and on that line will be your version. Once you have the versions figured out, zip up the plugin as if you were going to distribute it and upload it to Kernl.
- Thats it! Distribute this copy of the plugin to your clients and they’ll receive private updates whenever you upload a new copy or push a new version to your BitBucket repository.
Pushing a New Version
With all the boilerplate setup complete, getting a new update out to your clients is super easy. Follow the steps below and you’ll be good to go.
- Make code changes. Whatever change you want to push out, go ahead and make it.
- Update your plugin’s version. This is typically in the comment document block in your functions.php file.
- Update the kernl.version file. This should match your functions.php version.
- Commit
- Push to the branch you specified in your plugin setup on Kernl. If you didn’t specify a branch, that means you’ll need to push to master.
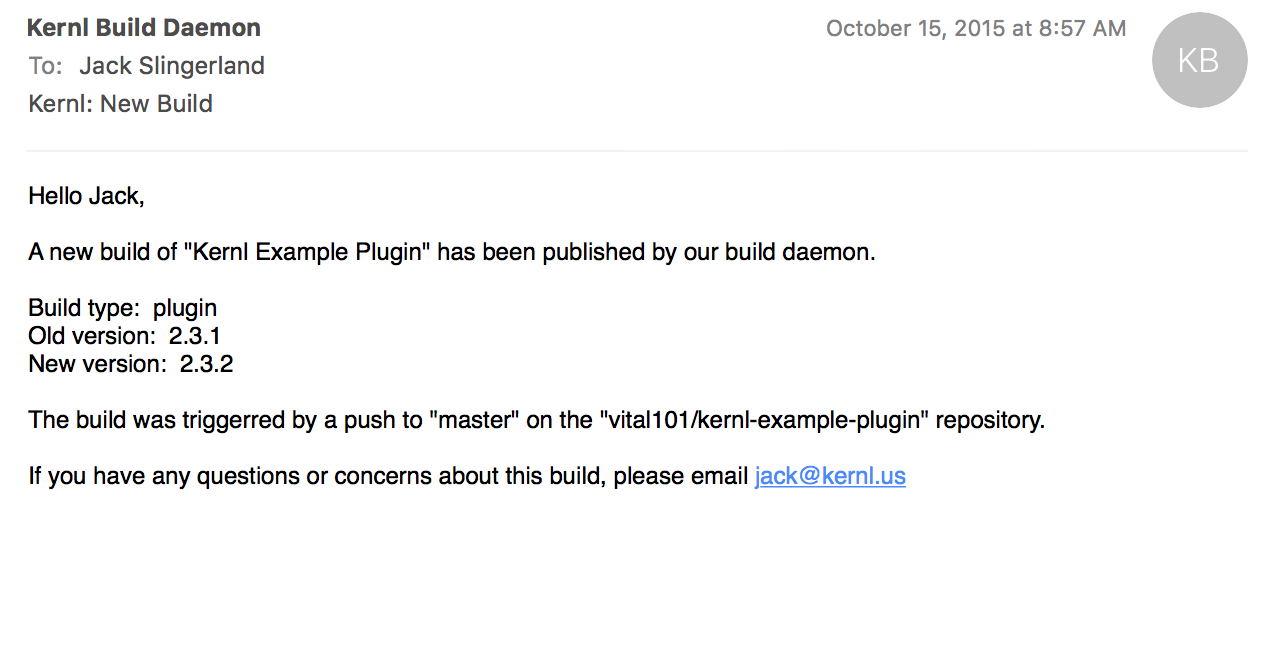
- Done. If all went well, you’ll receive an email from Kernl that lets you know about the new version that was pushed. You can also verify that the plugin was built by visiting Kernl and looking in the version list for your plugin.
If you’ve ever wanted to modernize your WordPress development pipeline, I highly suggest you check out Kernl. Automatic updates triggered by changes in your repository will save you tons of time and get bug fixes and updates out to your clients faster.