Categories
PHP Programming

PHP Dark Arts: Client-Side PHP

Look, we need to talk about your PHP addiction. I get it – you’ve mastered the server-side arts, bent databases to your will, and perhaps even dabbled in our previous dark art of threading. But something’s missing, isn’t it? You look at those fancy JavaScript developers with their client-side rendering and think “why not PHP?”

Well, my dedicated PHP acolyte, today we’re going to commit what many would consider a cardinal sin: We’re going to run PHP in the browser. Through the forbidden magic of WebAssembly, we’ll make the impossible possible. But first…

⚠️ STANDARD DARK ARTS DISCLAIMER ⚠️
This article is for entertainment and educational purposes only. If you deploy this in production, you will be visited by three ghosts: the Ghost of Bad Architecture Past, the Ghost of Debugging Present, and the Ghost of Maintenance Future. You have been warned.

The Theory of Forbidden Knowledge

Before we dive into our dark ritual, let’s understand what we’re attempting here. WebAssembly (WASM) is a binary instruction format that allows us to run code written in languages like C++ and Rust in the browser at near-native speed. PHP itself is written in C, which means…yes, with the right incantations, we can compile PHP itself to WASM.

The Components of Our Curse

  1. Emscripten – Our magical compiler that will transform PHP into WebAssembly
  2. PHP source code – The victim of our transformation
  3. JavaScript glue code – The unholy binding that will tie it all together
  4. A very specific set of PHP extensions – Because we’re masochists, but not completely insane

Setting Up the Dark Ritual

First, you’ll need to install Emscripten. If you’re on a Unix-like system:

git clone https://github.com/emscripten-core/emsdk.git
cd emsdk
./emsdk install latest
./emsdk activate latest
source ./emsdk_env.sh

Next, we need to get PHP’s source code and prepare it for our dark purposes:

git clone https://github.com/php/php-src.git
cd php-src
git checkout PHP-8.2.0 # Let's use a stable version for our unstable purposes

The Cursed Configuration

Here’s where it gets interesting. We need to configure PHP to be compiled with Emscripten. Create a build script named build-wasm.sh:

#!/bin/bash

emconfigure ./configure \
  --disable-all \
  --disable-cgi \
  --disable-cli \
  --disable-rpath \
  --disable-phpdbg \
  --disable-shared \
  --enable-static \
  --without-pear \
  --without-pcre-jit \
  --with-layout=GNU \
  --enable-embed=static \
  CFLAGS="-O3" \
  LDFLAGS="-O3"

emmake make

The Forbidden Function

Now for the fun part. We’ll create a simple PHP function that we want to run in the browser. Create a file called dark-arts.php:

<?php
function summonDarkPower($input) {
    return "🦇 Behold, client-side PHP has processed: " . $input . " 🦇";
}
?>

The Binding Spell (JavaScript)

We need some JavaScript to bind our PHP WASM module to the browser world. Create dark-binding.js:

let phpModule;

async function initPHP() {
    phpModule = await Module();
    // Initialize PHP WASM environment
    phpModule.ccall('php_embed_init', 'number', ['number', 'number'], [0, 0]);
}

async function runPHP(input) {
    if (!phpModule) await initPHP();

    // Allocate memory for our input string
    const inputPtr = phpModule.allocate(
        phpModule.intArrayFromString(input),
        phpModule.ALLOC_NORMAL
    );

    // Create our PHP code string
    const phpCode = `<?php 
        include 'dark-arts.php';
        echo summonDarkPower('${input}');
    ?>`;

    const codePtr = phpModule.allocate(
        phpModule.intArrayFromString(phpCode),
        phpModule.ALLOC_NORMAL
    );

    // Execute PHP code
    const result = phpModule.ccall(
        'zend_eval_string',
        'number',
        ['string', 'string', 'string'],
        [phpCode, 'dark-arts', '1']
    );

    // Clean up
    phpModule._free(inputPtr);
    phpModule._free(codePtr);

    return result;
}

The Final Incantation

Now, let’s put it all together in an HTML file that summons our dark creation:

<!DOCTYPE html>
<html>
<head>
    <title>PHP Dark Arts: Client-Side Edition</title>
    <style>
        body {
            background: #1a1a1a;
            color: #00ff00;
            font-family: monospace;
        }
        #output {
            border: 1px solid #00ff00;
            padding: 20px;
            margin: 20px;
            min-height: 100px;
        }
    </style>
</head>
<body>
    <h1>🕯️ PHP Dark Arts Console 🕯️</h1>
    <input type="text" id="input" placeholder="Enter text to process...">
    <button onclick="performRitual()">Summon</button>
    <div id="output"></div>

    <script src="php-wasm.js"></script>
    <script src="dark-binding.js"></script>
    <script>
        async function performRitual() {
            const input = document.getElementById('input').value;
            const output = document.getElementById('output');
            try {
                const result = await runPHP(input);
                output.innerHTML += `<div>${result}</div>`;
            } catch (e) {
                output.innerHTML += `<div style="color: red">The ritual failed: ${e}</div>`;
            }
        }
    </script>
</body>
</html>

Running Our Creation

To witness this abomination in action:

  1. Compile everything with Emscripten:
emcc -o php-wasm.js php-src/sapi/embed/php_embed.c \
    php-src/.libs/libphp.a \
    -s WASM=1 \
    -s EXPORTED_FUNCTIONS='["_php_embed_init", "_zend_eval_string"]' \
    -s EXPORTED_RUNTIME_METHODS='["ccall", "allocate", "intArrayFromString", "ALLOC_NORMAL"]' \
    -s INITIAL_MEMORY=33554432
  1. Serve it with your favorite local web server:
php -S localhost:8080
  1. Open your browser and behold your creation at http://localhost:8080

The Results

If everything went according to plan (ha!), you should now have a working example of PHP running in your browser. Type something into the input box, click “Summon,” and watch as your text is processed by actual PHP code running in WebAssembly.

But Why Though?

Look, we’ve done something impressive here. We’ve taken PHP, a language designed to generate HTML on the server, and forced it to run in the browser through sheer willpower and questionable decision-making. Is it practical? Absolutely not. Is it cool? Debatable. Will it make senior developers cry? Absolutely.

Potential “Uses” (Air Quotes Heavily Implied)

  1. Running legacy PHP code in the browser when migrating to a modern frontend framework
  2. Making your website completely incomprehensible to future maintainers
  3. Winning bets about what’s possible with PHP
  4. Getting fired in a particularly memorable way

Next Time…

In our next installment of PHP Dark Arts, we’ll explore creating a blockchain implementation entirely in PHP using nothing but arrays and regret. Until then, keep your code dark and your intentions questionable!
Categories
Other Programming

Methods & Properties with Javascript OOP

Note: This isn’t quite OOP. It’s actually called the “module pattern”.

If you come from a language such as Python, PHP, or Java, you’re used to having public and private methods and variables. In Javascript this is possible too, but it’s not nearly as straight-forward. To make this happen, you usually need to wade through Javascript’s prototype inheritance. However, there is another way.

Step 1: Create your class.

function MyClass(somevar) {
}

Now that your class is created, you can instantiate an instance of it by doing the following:

var x = new MyClass(123);

Step 2: Public Methods and Properties

To expose properties and methods to the public, you need to attach them to an object and return it. Some people will attach to this, but I prefer to create a new object called self and return that. It keeps me from getting confused with what this scope I’m in. One thing to remember, is that anything inside of your class that isn’t in a function gets executed as soon as you create a new instance of it.

function MyClass(somevar) {
	var self = {};
 
	// Check to make sure somevar is defined and then
	// assign it to the my_property public property.
	if(somevar === undefined) { somevar = false; }
	self.my_property = somevar;
 
	// A public method!
	self.alert_loop = function(count) {
		if(count === undefined) { count = 1; }
		for(var i = 0; i < count; i++) {
			alert(self.my_property);
		}
	};
 
	return self;
}

You’ll see that we have two things exposed here: my_property and alert_loop. To access them, do this:

var x = new MyClass("Hi!");
alert(x.my_property); // Alerts "Hi!"
x.alert_loop(2); // Alerts "Hi!" twice

Step 3: Private Methods and Variables

Creating private methods and variables is very easy using this method Javascript OOP. All you do is not attach the variable or method to the self object.

function MyClass(somevar) {
	var self = {};
 
	/* Private */
	var loop_max = 2;
	function add_numbers(x,y) {
		return x + y;
	}
 
	/* Public stuff */
 
	if(somevar === undefined) { somevar = false; }
	self.my_property = somevar;
 
	self.alert_loop = function(count) {
		if(count === undefined) { count = 1; }
		for(var i = 0; i < count; i++) {
			alert(self.my_property);
		}
	};
 
	self.alert_numbers = function() {
		for(var i = 0; i < loop_max; i++) {
			alert(add_numbers(i,i+1));
		}
	};
 
	return self;
}

And to use it:

var x = new MyClass("Hi!");
x.add_numbers(1,2); // Will fail.
alert(x.loop_max);  // Will fail.
x.alert_numbers();  // works!

Conclusion

That’s it! Using this style of OOP in Javascript is easy to learn and easy to understand. If you have any questions, drop a comment and I’ll get back to you.

Categories
Other Programming

Using JSHint with Sublime Text 2

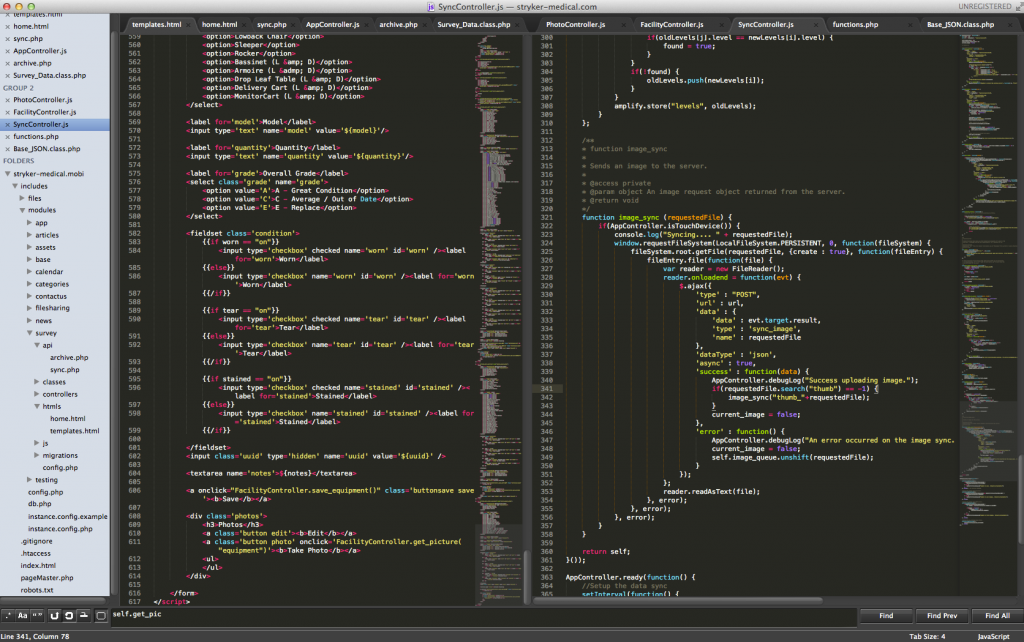
Awhile ago I was looking an editor that was cross platform, light weight, and awesome. I’d dabbled with Netbeans in the past, but found it to be a little heavy for what I needed it for. I ended up settling on Sublime Text 2. I have a hard time coming up with words for how awesome Sublime Text 2 is, so here’s a screenshot of my current window.

JSHint

One of the languages I find myself writing frequently is Javascript. As most of you know, Javascript has an assortment of odd conventions that can be pretty hard to remember. Code quality checkers like JSLint and JSHint exist for this reason. Prior to Sublime Text 2 I never bothered integrating either of those tools into my editor, but found myself needing to streamline my development process.

Sublime Text 2 provides an easy way to write build systems depending on which language you’re using. The sublime-jshint plugin takes advantage of this. All you do to make this work is go to the sublime-jshint GitHub page, and follow the instructions. Once it’s installed, run CTRL+B (CMD+B on Mac) while inside a Javascript file and you should see output like this.

Categories
jQuery

jQuery Chaining

jQuery is the jewel in the crown that is web development. Once you discover it, Javascript is no longer a chore to write, hell, it might even be considered fun! Sure being able to select elements by ID, class, or type is great, but what about all the other stuff? What about chaining? I’ve heard such great stuff about it!

Chaining

The first thing you need to know about chaining is that you chain actions on to collections. A collection is what is returned when you select something using jQuery.

$("input");  //Collection of all input elements on the page.

When most people start using jQuery, they do something like this:

$("input").val("123");
$("input").addClass("awesome");
$("input").attr("data-bind", "15");

Yes, this code will work, but it’s inefficient. Every time you perform a selection, jQuery must traverse the DOM and find all the input elements. If you use chaining, it will simply use the collection of input elements that it already has.

$("input")
	.val("123")
	.addClass("awesome")
	.attr("data-bind", "15");

So why does this work? Because each method that you call in the chain returns the collection. So in this case “val()”, “addClass()”, and “attr()” all return “$(input)”. However, not all methods support chaining. For instance, the “text()” method breaks the chain, so if you’re going to use it, do it at the end.
What if you want to keep the chain alive though? No problem. You can simply back-out of the destructive action using the “end()” method.

Before

<ol id='mylist'>
	<li>
	</li>
	<li>
	</li>
	<li>
	</li>
</ol>

Javascript

$('#mylist')
	.find('>li')
		.filter(':last')
			.addClass('Meow')
		.end()
		.filter(':first')
			.addClass('Mix')
		.end()
		.addClass('catfood')
	.end()
	.addClass('thelist');

After

<ol id='mylist' class='thelist'>
	<li class='Mix catfood'>
	</li>
	<li class='catfood'>
	</li>
	<li class='Meow catfood'>
	</li>
</ol>

While sometimes confusing, you can see that chaining is often the most efficient way to handle modifying the DOM.

Writing Chainable Plugins/Functions

Now that you know all about chaining, you’ll probably want to write your own chainable plugins/functions. It’s very easy to do this, since all you need to do is return the jQuery object at the end of the function.

In this example, we’ll write a plugin that attaches a second counter to an element.

Plugin

(function($) {
	$.fn.count = function() {
		return this.each(function() {  //We do an 'each', because the collection may have more than one item in it.
			var self = $(this);  //
			self.html('0');
			var theInterval = window.setInterval(function() {
				var c = parseFloat(self.text());
				self.html(c + 1);
			}, 1000);
		});
	}
}) (jQuery);

HTML

<div>
	<span id='test'></span>
</div>

Execution

$("#test").count().parent().addClass('counters'); //Chaining still works :)
Categories
Other Programming PHP Programming

HTML 5 Canvas: Saving to a File with PHP

So you’ve finally discovered the wonder that is the HTML5 Canvas element. Great! If you’re like me, the first thing I wanted to do with it was doodle on it. I eventually worked out how to map touch/mouse events to the canvas and draw lines, but I wanted to save my creations!

As it turns out, the Canvas element has a method called toDataURL(), which base64 encodes the entire Canvas element and returns it as a string. From there, you can just pump it over to a server and handle it from there. Here’s the step-by-step, which assumes you are also running jQuery on your site.

Step 1: Save the canvas and POST the data

var data = document.getElementById("myCanvasID").toDataURL();
$.post("process.php", {
	imageData : data
}, function(data) {
	window.location = data;
});

Step 2: Process the POST data, and save it to a file.

$data = substr($_POST['imageData'], strpos($_POST['imageData'], ",") + 1);
$decodedData = base64_decode($data);
$fp = fopen("canvas.png", 'wb');
fwrite($fp, $decodedData);
fclose();
echo "/canvas.png";

Note: The first line of this script removes the header information that is sent with the encoded data.

Thats all there is to it. You can now easily save your HTML 5 awesomeness.

Categories
Other Programming

jQuery Map Function

Sometimes when you are making a web application you neeed to search some data. A lot of the time, it exists as an array in memory. I recently came across such a problem on a Phonegap project I’m working on. The app has to work offline, so my sorting needed to take place in Javascript. Since we’re using jQuery with this app, I decided to play with jQuery’s Map function. Map takes your array and performs an operation over each value in it. This was super handy in my case because it allowed me to search through my data at fast pace, without having to make an ajax call out to my database to do a search with MySQL.

Example:

var searchTerm = $("#searchField").val().toUpperCase();
var results = $.map(self.defaultProductList, function(product,i) {
	if(product.name.toUpperCase().search(searchTerm) != -1) {
		return product;
	}
});

searchTerm is the value that I’m searching for. .map takes an array as it’s first argument, and then a function as it’s second. I created an anonymous function that checks to see if the search term is in the current object. If it is, I return the value so it can be added to the final array. All in all, an excellent way of searching through data when you don’t have the luxury of a database to query.

Categories
Other

Remove undefined from a Javascript object

I’ve been doing a fair amount of javascript programming lately, and I found myself needing to remove a nested object from an object.  Doing this is easy enough with the “delete” command, but it leaves you with annoying “undefined”s all over.  To get around that, I scoured the internet for a way to remove them easily.  Turns out that if efficiency isn’t a problem, it’s easier to drop the right objects into an array and then re-assign it.

var tmpArray = new Array();
for(el in self.orderData.data.items) {
     if(self.orderData.data.items[el]) {
          tmpArray.push(self.orderData.data.items[el]);
     }
}
self.orderData.data.items = tmpArray;

Easy and pie.

Categories
Other Programming

Load Javascript Dynamically With Lazy Load

One of the blessings (or plagues) or the “Web 2.0” revolution is heavy use of Javascript.  Used properly, Javascript can enhance your user experience to nearly the level of a desktop application.  Used poorly, and you’re browser is going to crash and burn.  But this post isn’t about using Javascript, it’s about loading it.

You see, a large amount of web developers don’t think about how their web page is loaded.  They think that no matter where scripts are included, its going to take the same time to load.  Actually, this is true.  What we’re after is an apparent decrease in load time.  When you include Javascript files at the top of your HTML document, as soon as the browser encounters the Javascript it will load and execute it.  The problem here is that loading a Javascript file is a blocking call in most web browsers.  What does this mean to you?  It means that while the Javascript is loading, the rest of your page isn’t.  The apparent page load time has increased.

To get around this problem, some web developers have started including their scripts as the last element in the <body> tag.  Done this way, your entire page loads on to the screen before the Javascript starts to load.  The apparent page load time as decreased.  Yes, the script will still take the same time to download and execute, but now people will see content almost immediately.

But why should you include some Javascript files if you aren’t sure the user is going to make use of them?  Enter Lazy Load.  Lazy Load allows you to easily include Javascript or CSS files on the fly.  This is especially helpful when you have large files that need to be loaded.  For instance, a sweet new carousel for your site.  It’s probably pretty large, and the user is going to have to wait for it anyways.  Using Lazy Load you can decrease your site’s apparent and actual load time.  It’s also small (~800 bytes minified), so you won’t need to worry about the footprint.  Oh, it’s really easy too…

LazyLoad.js('http://example.com/foo.js', function () {
     alert('foo.js has been loaded');
});