Categories
Other Other Programming

Things I Learned in my First Year as a Software Engineering Manager

For the past decade I was a software engineer at a number of different companies. At each company I learned a lot of stuff, honed my craft, and eventually decided that I wanted to be a manager. I knew that it was a much different position from being a senior or lead engineer, but I wasn’t quite prepared for the number of things that I was going to learn.

Overall it was a great experience, so I thought I’d write down some of my learnings here for posterity. So here we go, in no particular order.

  • This is completely different from being an engineer – Its not a progression from the job of a senior or lead engineer. It’s a different career entirely. If you expect it to lead engineer + some HR stuff, you are very wrong.
  • You will feel overwhelmed – This is a normal feeling. Its a lot like the first real job you took after college. You know what you should be doing, but actually doing it turns out to be a lot harder.
  • Meetings Meetings Meetings – You no longer have a maker schedule. As a manager, your schedule is now interrupt driven. This is good. People are interrupting you instead of your team. Helping remove distractions so they can stay in flow state is an important part of your job.
  • Managing up is just as important as managing down – Part of your job as a manager is to set and manage expectations within the rest of your organization for the work your team is doing. Knowing what information is worth sharing up the chain is just as important as knowing what information to keep back.
  • Relationships matter – As an individual contributor your relations within your team matter a lot. Outside? Not quite as much, but still important. As a manager, your relationships outside of your team matter lots. Cultivate them. Have a drink after work with other managers, directors, product people, whatever. Having strong bonds with these people will make it easier to resolve conflicts because your relationship won’t start out as adversarial.
  • Choose words wisely – Whether you think they should or not, the words you use now carry more weight. Choose them carefully.
  • Toxic people – After managing for awhile you start to identify people can be toxic to a team. This doesn’t mean that they always are, but they possess the ability to be. They may not even realize it. Don’t be afraid to call them out (in private) if they are being a detractor.
  • Hands off – Sometimes managing people and a team is knowing when not to manage at all. Some teams are jelled together really well. All you need to do is remove blockers and let ’em rip. Other teams need a little more hand-holding. This is ok. Just know which team is which. If you hand-hold a high performing team you will make them less effective.
  • Always be honest – You are managing groups of intelligent highly sought after engineers. Don’t treat them like children. If they have questions, answer them honestly. If you can’t tell them something for some reason, make sure they understand you aren’t trying to be evasive. In general people like candidness.
  • 1 on 1 meetings – You should try to have 1:1 meetings with all of your employees, but leave the cadence up to them. Some people want more interaction, others want less. In my experience, the more senior the person the less 1:1 time they want or need.

One last note before I go: Imposter syndrome is real. I’ve always known I was a good engineer. My track record delivering, career, and salary path all back up that idea of myself. As an engineering manager I have no track record, so I feel like an imposter sometimes. You get over it, but it hits hard.

Categories
Javascript Kernl News Other Programming

0 to 1 Million: Scaling my side project to 1 million requests a day

In the Beginning

In late 2014 I decided that I needed a side project.  There were some technologies that I wanted to learn, and in my experience building an actual project was the best way to do that.  As I sat on my couch trying to figure out what to build, I remembered an idea I had back when I was still a junior dev doing WordPress development.  The idea was that people building commercial plugins and themes should be able to use the automated update system that WordPress provides.  There were a few self-managed solutions out there for this, but I thought building a SaaS product would be a good way to learn some new tech.

Getting Started

My programming history in 2014 looked something like: LAMP (PHP, MySQL, Apache) -> Ruby on Rails -> Django.  In 2014 Node.js was becoming extremely popular and MongoDB had started to become mature.  Both of these technologies interested me, so I decided to use them on this new project.  As to not get too overwhelmed with learning things, I decided to use Angular for fronted since I was already familiar with it.

A few months after getting started, I finally deployed https://kernl.us for the world to see.  To give you an idea of the expectations I had for this project, I deployed it to a $5/month Digital Ocean droplet.  That means everything (Mongo, Nginx, Node) was on a single $5 machine.  For the next month or two, this sufficed since my traffic was very low.

The First Wave

In December of 2014 things started to get interesting with Kernl.  I had moved Kernl out of a closed alpha and into beta, which led to a rise in sign ups.  Traffic steadily started to climb, but not so high that it couldn’t be handled by a single $5 droplet.

Around December 5th I had a customer with a large install base start to use Kernl.  As you can see the graph scale completely changes.  Kernl went from ~2500 requests per day, to over 2000 requests per hour.  That seems like a lot (or it did at the time), but it was still well within what a single $5 droplet could handle.  After all, thats less that 1 request per second.

Scaling Up

Through the first 3 months of 2015 Kernl experienced steady growth.  I started charging for it in February, which helped fuel further growth as it made customers feel more comfortable trusting it with something as important as updates.  Starting in March, I noticed that resource consumption on my $5 droplet was getting a bit out of hand.  Wanting to keep costs low (both in my development time and actual money) I opted to scale Kernl vertically to a $20 per month droplet.  It had 2GB of RAM and 2 cores, which seemed like plenty.  I knew that this wasn’t a permanent solution, but it was the lowest friction one at the time.

During the ‘Scaling Up’ period that Kernl went through, I also ran into issues with Apache.  I started out by using Apache as a reverse proxy because I was familiar with it, but it started to fall over on me when I would occasionally receive requests rates of about 20/s.  Instead of tweaking Apache, I switched to using Nginx and have yet to run in to any issues with it.  I’m sure Apache can handle far more that 20 requests/s, but I simply don’t know enough about tweaking it’s settings to make that happen.

SCaling Out & Increasing Availability

For the rest of 2015 Kernl saw continued steady growth.  As Kernl grew and customers started to rely on it for more than just updates (Bitbucket / Github push-to-build), I knew that it was time to make things far more reliable and resilient than they currently were.  Over the course of 6 months, I made the following changes:

  • Moved file storage to AWS S3 – One thing that occasionally brought Kernl down or resulted in dropped connections was when a large customer would push an update out.  Lots of connections would stay open while the files were being download, which made it hard for other requests to get through without timing out.  Moving uploaded files to S3 was a no-brainer, as it makes scaling file downloads stupid-simple.
  • Moved Mongo to Compose.io – One thing I learned about Mongo was that managing a cluster is a huge pain in the ass.  I tried to run my own Mongo cluster for a month, but it was just too much work to do correctly.  In the end, paying Compose.io $18/month was the best choice.  They’re also awesome at what they do and I highly recommend them.
  • Moved Nginx to it’s own server – In the very beginning, Nginx lived on the same box as the Node application.  For better scaling (and separation of concerns) I moved Nginx to it’s own $5 droplet.  Eventually I would end up with 2 Nginx servers when I implemented a floating ip address.
  • Added more Node servers – With Nginx living on it’s own server, Mongo living on Compose.io, and files being served off of S3, I was able to finally scale out the Node side of things.  Kernl currently has 3 Node app servers, which handle requests rates of up to 170/second.

Final Thoughts

Over the past year I’ve wondered if taking the time to build things right the first time through would have been worth it.  I’ve come to the conclusion that optimizing for simplicity is probably what kept me interested in Kernl long enough to make it profitable.  I deal with enough complication in my day job, so having to deal with it in a “fun” side project feels like a great way to kill passion.

Categories
Clojure Other Programming

Learning Clojure: Part 1

Clojure is a functional programming language based on Lisp and written to run on top of the JVM. I’ve tried learning it in the past, but have failed mostly due to biting off more than I could chew. But not this time! I’m taking my time, reading lots of code, and doing 1st year computer science assignments with it. I figure this worked well when I first learned how to program, so it will probably work well now.

The Return to Trivial Programs

After spending the past 6 years neck deep in non-trivial professional programming, I’m returning to trivial toy programs to learn Clojure. My first task is to write a program that takes user input from the terminal and calculates their salary at a year which they input. More specifically:

  • Starting salary is $1000
  • Salary doubles every year
  • Validate input to make sure it is a number.
  • Write history to file called: salary_history.txt
  • In format…. [years_working]:$[salary]

All in all its pretty straight forward. I currently could write this program in a handful of different languages (Python, PHP, Java, Javascript [Node], Ruby), but am struggling with one bit of the Clojure implementation.

(ns salary.core
  (:gen-class))
 
(defn get-integer
    "Returns a string in integer form, else false."
    [input]
    (try
        (#(Integer/parseInt %) input)
        (catch Exception e false)))
 
;; Incomplete.  Will eventually write to a file.
(defn output
    "Takes the console input and error message and outputs them to file and console."
    [console-input message]
    (println (str console-input ": " message)))
 
;;
;; ????? WTF DO I DO HERE
;;
(defn calculate-salary
    [years]
    ())
 
(defn -main
  [& args]
  (println "How many years do you want to work?")
  (let [user-input (read-line)]
    (let [years (get-integer user-input)]
        (if years
            (calculate-salary (- years 1) 1000)
            (output user-input "This is NOT an integer.")))))

The Python implementation of calculate salary would look something like this:

def calculate_salary(years):
    salary = 1000
    for i in range(years-1):
        salary = salary * 2
    return salary

But in Clojure things are bit more complicated. In Clojure values are immutable. I can’t just loop over the years and keep doubling the salary while storing it in the same variable. I need to use recursion. Or reduce. Or map. Hell, I don’t know. I need to use something functional, lest I want the Clojure experts to laugh at me. I need something that will call a function that doubles whatever value comes into it, then returns. Then I need to call said function up to N times (where N is the number of years that the person enters).

Any ideas?

EDIT
With the help of Ryan (below), I came up with:

(defn calculate-salary
    [years salary]
    (if (= years 0)
        salary
        (calculate-salary (- years 1) (* salary 2))))
Categories
Other Programming

Requirements

There is a grand myth about requirements–if you write them down, users will get exactly what they want. That’s not true. At best, users will get exactly what was written down, which may or may not be anything like what they really want.
– Mike Cohn, “Succeeding with Agile”

Categories
Other Programming

Methods & Properties with Javascript OOP

Note: This isn’t quite OOP. It’s actually called the “module pattern”.

If you come from a language such as Python, PHP, or Java, you’re used to having public and private methods and variables. In Javascript this is possible too, but it’s not nearly as straight-forward. To make this happen, you usually need to wade through Javascript’s prototype inheritance. However, there is another way.

Step 1: Create your class.

function MyClass(somevar) {
}

Now that your class is created, you can instantiate an instance of it by doing the following:

var x = new MyClass(123);

Step 2: Public Methods and Properties

To expose properties and methods to the public, you need to attach them to an object and return it. Some people will attach to this, but I prefer to create a new object called self and return that. It keeps me from getting confused with what this scope I’m in. One thing to remember, is that anything inside of your class that isn’t in a function gets executed as soon as you create a new instance of it.

function MyClass(somevar) {
	var self = {};
 
	// Check to make sure somevar is defined and then
	// assign it to the my_property public property.
	if(somevar === undefined) { somevar = false; }
	self.my_property = somevar;
 
	// A public method!
	self.alert_loop = function(count) {
		if(count === undefined) { count = 1; }
		for(var i = 0; i < count; i++) {
			alert(self.my_property);
		}
	};
 
	return self;
}

You’ll see that we have two things exposed here: my_property and alert_loop. To access them, do this:

var x = new MyClass("Hi!");
alert(x.my_property); // Alerts "Hi!"
x.alert_loop(2); // Alerts "Hi!" twice

Step 3: Private Methods and Variables

Creating private methods and variables is very easy using this method Javascript OOP. All you do is not attach the variable or method to the self object.

function MyClass(somevar) {
	var self = {};
 
	/* Private */
	var loop_max = 2;
	function add_numbers(x,y) {
		return x + y;
	}
 
	/* Public stuff */
 
	if(somevar === undefined) { somevar = false; }
	self.my_property = somevar;
 
	self.alert_loop = function(count) {
		if(count === undefined) { count = 1; }
		for(var i = 0; i < count; i++) {
			alert(self.my_property);
		}
	};
 
	self.alert_numbers = function() {
		for(var i = 0; i < loop_max; i++) {
			alert(add_numbers(i,i+1));
		}
	};
 
	return self;
}

And to use it:

var x = new MyClass("Hi!");
x.add_numbers(1,2); // Will fail.
alert(x.loop_max);  // Will fail.
x.alert_numbers();  // works!

Conclusion

That’s it! Using this style of OOP in Javascript is easy to learn and easy to understand. If you have any questions, drop a comment and I’ll get back to you.

Categories
Other Programming

Using JSHint with Sublime Text 2

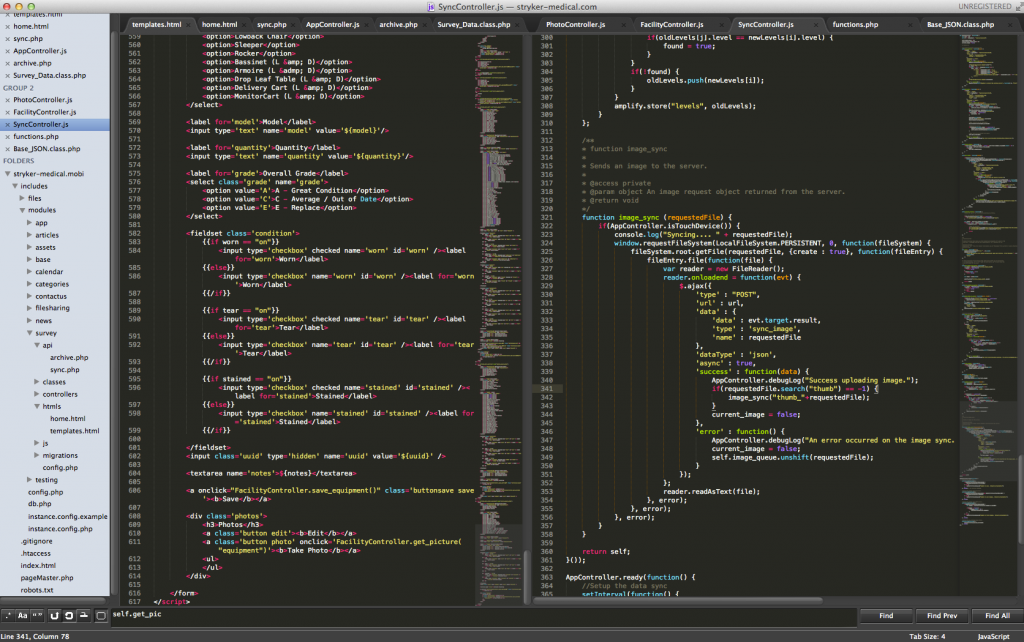
Awhile ago I was looking an editor that was cross platform, light weight, and awesome. I’d dabbled with Netbeans in the past, but found it to be a little heavy for what I needed it for. I ended up settling on Sublime Text 2. I have a hard time coming up with words for how awesome Sublime Text 2 is, so here’s a screenshot of my current window.

JSHint

One of the languages I find myself writing frequently is Javascript. As most of you know, Javascript has an assortment of odd conventions that can be pretty hard to remember. Code quality checkers like JSLint and JSHint exist for this reason. Prior to Sublime Text 2 I never bothered integrating either of those tools into my editor, but found myself needing to streamline my development process.

Sublime Text 2 provides an easy way to write build systems depending on which language you’re using. The sublime-jshint plugin takes advantage of this. All you do to make this work is go to the sublime-jshint GitHub page, and follow the instructions. Once it’s installed, run CTRL+B (CMD+B on Mac) while inside a Javascript file and you should see output like this.

Categories
Other Programming PHP Programming

HTML 5 Canvas: Saving to a File with PHP

So you’ve finally discovered the wonder that is the HTML5 Canvas element. Great! If you’re like me, the first thing I wanted to do with it was doodle on it. I eventually worked out how to map touch/mouse events to the canvas and draw lines, but I wanted to save my creations!

As it turns out, the Canvas element has a method called toDataURL(), which base64 encodes the entire Canvas element and returns it as a string. From there, you can just pump it over to a server and handle it from there. Here’s the step-by-step, which assumes you are also running jQuery on your site.

Step 1: Save the canvas and POST the data

var data = document.getElementById("myCanvasID").toDataURL();
$.post("process.php", {
	imageData : data
}, function(data) {
	window.location = data;
});

Step 2: Process the POST data, and save it to a file.

$data = substr($_POST['imageData'], strpos($_POST['imageData'], ",") + 1);
$decodedData = base64_decode($data);
$fp = fopen("canvas.png", 'wb');
fwrite($fp, $decodedData);
fclose();
echo "/canvas.png";

Note: The first line of this script removes the header information that is sent with the encoded data.

Thats all there is to it. You can now easily save your HTML 5 awesomeness.

Categories
Other Programming

jQuery Map Function

Sometimes when you are making a web application you neeed to search some data. A lot of the time, it exists as an array in memory. I recently came across such a problem on a Phonegap project I’m working on. The app has to work offline, so my sorting needed to take place in Javascript. Since we’re using jQuery with this app, I decided to play with jQuery’s Map function. Map takes your array and performs an operation over each value in it. This was super handy in my case because it allowed me to search through my data at fast pace, without having to make an ajax call out to my database to do a search with MySQL.

Example:

var searchTerm = $("#searchField").val().toUpperCase();
var results = $.map(self.defaultProductList, function(product,i) {
	if(product.name.toUpperCase().search(searchTerm) != -1) {
		return product;
	}
});

searchTerm is the value that I’m searching for. .map takes an array as it’s first argument, and then a function as it’s second. I created an anonymous function that checks to see if the search term is in the current object. If it is, I return the value so it can be added to the final array. All in all, an excellent way of searching through data when you don’t have the luxury of a database to query.