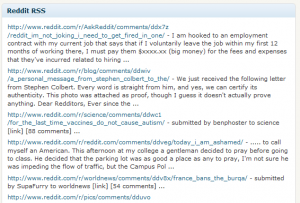
Historically, I’ve never been a huge fan of the WordPress Dashboard. Not because I don’t think it’s a good idea, but mostly because I don’t use it. Before I turned this into a WordPress / PHP development blog, I posted infrequently and never saw the point of having a dashboard view. Now that I have traffic, and hope to get more (*crosses fingers*), I’m spending a lot of time there. Since I’m spending so much time on the dashboard, I thought I might make a bit more useful with a widget.
Note: The full (working) version of this Dashboard Widget is available here.

Step 1: Decide What You’re Going To Create
The first step in this tutorial is deciding what to create. I’m personally a HUGE fan of Reddit, but often enough I’m unable to read it because I’m busy managing this blog. So, why not bring Reddit to me? This tutorial will show you every step of how to create a WordPress Dashboard Widget that displays Reddit’s RSS feed.
Step 2: Write The Display Code
As most readers here know, WordPress is well on it’s way to being a full-fledged CMS. As with any good CMS, extending any part should be easy. It’s no different with the WordPress Dashboard. Using the wp_add_dashboard_widget function, you can hook into the WordPress Dashboard and drop in your own widgets. But first, we must write the widget itself.
1
2
3
4
5
6
7
8
9
10
11
12
13
14
15
16
17
18
19
20
21
22
23
24
25
26
27
28
29
30
31
32
33
34
35
36
37
38
39
40
41
42
| function reddit_rss_dashboard_widget_function() {
$rss = fetch_feed( "http://www.reddit.com/.rss" );
if ( is_wp_error($rss) ) {
if ( is_admin() || current_user_can('manage_options') ) {
echo '<p>';
printf(__('<strong>RSS Error</strong>: %s'), $rss->get_error_message());
echo '</p>';
}
return;
}
if ( !$rss->get_item_quantity() ) {
echo '<p>Apparently, there is nothing happening on Reddit!</p>';
$rss->__destruct();
unset($rss);
return;
}
echo "<ul>\n";
if ( !isset($items) )
$items = 10;
foreach ( $rss->get_items(0, $items) as $item ) {
$publisher = '';
$site_link = '';
$link = '';
$content = '';
$date = '';
$link = esc_url( strip_tags( $item->get_link() ) );
$content = $item->get_content();
$content = wp_html_excerpt($content, 250) . ' ...';
echo "<li><a href='$link'>$link</a> - $content</li>\n";
}
echo "</ul>\n";
$rss->__destruct();
unset($rss);
} |
function reddit_rss_dashboard_widget_function() {
     $rss = fetch_feed( "http://www.reddit.com/.rss" );

     if ( is_wp_error($rss) ) {
          if ( is_admin() || current_user_can('manage_options') ) {
               echo '<p>';
               printf(__('<strong>RSS Error</strong>: %s'), $rss->get_error_message());
               echo '</p>';
          }
     return;
}

if ( !$rss->get_item_quantity() ) {
     echo '<p>Apparently, there is nothing happening on Reddit!</p>';
     $rss->__destruct();
     unset($rss);
     return;
}

echo "<ul>\n";

if ( !isset($items) )
     $items = 10;

     foreach ( $rss->get_items(0, $items) as $item ) {
          $publisher = '';
          $site_link = '';
          $link = '';
          $content = '';
          $date = '';
          $link = esc_url( strip_tags( $item->get_link() ) );

          $content = $item->get_content();
          $content = wp_html_excerpt($content, 250) . ' ...';

         echo "<li><a href='$link'>$link</a> - $content</li>\n";
}

echo "</ul>\n";
$rss->__destruct();
unset($rss);
}
Most of the above code is pretty easy to follow. But here’s breakdown of what happens if you’re a bit confused.
- We use the fetch_feed function to get the RSS feed from the supplied URL. In this case, it’s Reddit’s RSS feed.
- Check to see if there have been any errors (is_wp_error).
- Check to see if there was anything on the feed. ($rss->get_item_quantity).
- Loop through the fee printing out list items.
Step 3: Add The Widget To The Dashboard
In this step, you need to call wp_add_dashboard_widget from a function.
1
2
3
| function reddit_rss_add_dashboard_widget() {
wp_add_dashboard_widget('reddit_rss_dashboard_widget', 'Reddit RSS', 'reddit_rss_dashboard_widget_function');
} |
function reddit_rss_add_dashboard_widget() {
     wp_add_dashboard_widget('reddit_rss_dashboard_widget', 'Reddit RSS', 'reddit_rss_dashboard_widget_function');
}
The first argument in this function is the unique id that you give your widget. The second argument is the widget’s name. And the 3rd argument is the display function (which we just wrote).
Step 4: Initialize Your Widget
The fourth and final step to creating a WordPress Dashboard Widget is to use the add_action function to add it to the setup.
1
| add_action('wp_dashboard_setup', 'reddit_rss_add_dashboard_widget'); |
add_action('wp_dashboard_setup', 'reddit_rss_add_dashboard_widget');
Step 5: Clean Up
Once you have everything written, save it all in a file called reddit_dashboard_widget.php. From there, zip it up and upload it to your WordPress install as a plugin. Once activated, you’ll have Reddit’s RSS feed as a Dashboard Widget. It will show up towards the bottom, so you’ll need to re-order it to your liking.
Final Thoughts
As I brought together this dashboard widget as a proof of concept, I got to thinking about how it could be improved. One way would be to use more Ajax to fetch the updated feed. Or if the RSS feed doesn’t update frequently enough, we could scrape the page ever n minutes to get updated content. Also, at the suggestion of a reader, I’m going to start including full (working) examples with each tutorial. Enjoy!
Download the WordPress Reddit Dashboard Widget Here.
