Historically, I’ve never been a huge fan of the WordPress Dashboard. Not because I don’t think it’s a good idea, but mostly because I don’t use it. Before I turned this into a WordPress / PHP development blog, I posted infrequently and never saw the point of having a dashboard view. Now that I have traffic, and hope to get more (*crosses fingers*), I’m spending a lot of time there. Since I’m spending so much time on the dashboard, I thought I might make a bit more useful with a widget.
Note: The full (working) version of this Dashboard Widget is available here.
Step 1: Decide What You’re Going To Create
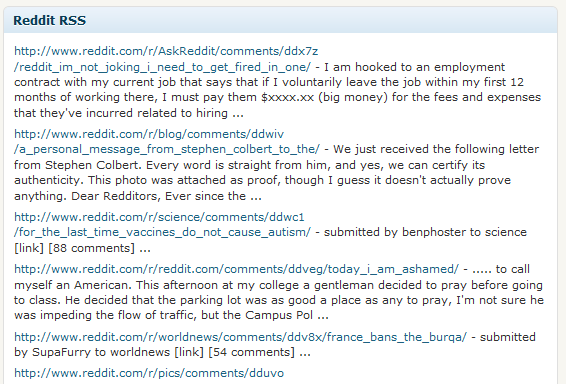
The first step in this tutorial is deciding what to create. I’m personally a HUGE fan of Reddit, but often enough I’m unable to read it because I’m busy managing this blog. So, why not bring Reddit to me? This tutorial will show you every step of how to create a WordPress Dashboard Widget that displays Reddit’s RSS feed.
Step 2: Write The Display Code
As most readers here know, WordPress is well on it’s way to being a full-fledged CMS. As with any good CMS, extending any part should be easy. It’s no different with the WordPress Dashboard. Using the wp_add_dashboard_widget function, you can hook into the WordPress Dashboard and drop in your own widgets. But first, we must write the widget itself.
1 2 3 4 5 6 7 8 9 10 11 12 13 14 15 16 17 18 19 20 21 22 23 24 25 26 27 28 29 30 31 32 33 34 35 36 37 38 39 40 41 42 | function reddit_rss_dashboard_widget_function() { $rss = fetch_feed( "http://www.reddit.com/.rss" ); if ( is_wp_error($rss) ) { if ( is_admin() || current_user_can('manage_options') ) { echo '<p>'; printf(__('<strong>RSS Error</strong>: %s'), $rss->get_error_message()); echo '</p>'; } return; } if ( !$rss->get_item_quantity() ) { echo '<p>Apparently, there is nothing happening on Reddit!</p>'; $rss->__destruct(); unset($rss); return; } echo "<ul>\n"; if ( !isset($items) ) $items = 10; foreach ( $rss->get_items(0, $items) as $item ) { $publisher = ''; $site_link = ''; $link = ''; $content = ''; $date = ''; $link = esc_url( strip_tags( $item->get_link() ) ); $content = $item->get_content(); $content = wp_html_excerpt($content, 250) . ' ...'; echo "<li><a href='$link'>$link</a> - $content</li>\n"; } echo "</ul>\n"; $rss->__destruct(); unset($rss); } |
Most of the above code is pretty easy to follow. But here’s breakdown of what happens if you’re a bit confused.
- We use the fetch_feed function to get the RSS feed from the supplied URL. In this case, it’s Reddit’s RSS feed.
- Check to see if there have been any errors (is_wp_error).
- Check to see if there was anything on the feed. ($rss->get_item_quantity).
- Loop through the fee printing out list items.
Step 3: Add The Widget To The Dashboard
In this step, you need to call wp_add_dashboard_widget from a function.
1 2 3 | function reddit_rss_add_dashboard_widget() { wp_add_dashboard_widget('reddit_rss_dashboard_widget', 'Reddit RSS', 'reddit_rss_dashboard_widget_function'); } |
The first argument in this function is the unique id that you give your widget. The second argument is the widget’s name. And the 3rd argument is the display function (which we just wrote).
Step 4: Initialize Your Widget
The fourth and final step to creating a WordPress Dashboard Widget is to use the add_action function to add it to the setup.
1 | add_action('wp_dashboard_setup', 'reddit_rss_add_dashboard_widget'); |
Step 5: Clean Up
Once you have everything written, save it all in a file called reddit_dashboard_widget.php. From there, zip it up and upload it to your WordPress install as a plugin. Once activated, you’ll have Reddit’s RSS feed as a Dashboard Widget. It will show up towards the bottom, so you’ll need to re-order it to your liking.
Final Thoughts
As I brought together this dashboard widget as a proof of concept, I got to thinking about how it could be improved. One way would be to use more Ajax to fetch the updated feed. Or if the RSS feed doesn’t update frequently enough, we could scrape the page ever n minutes to get updated content. Also, at the suggestion of a reader, I’m going to start including full (working) examples with each tutorial. Enjoy!
8 replies on “WordPress Dashboard Widget Tutorial”
[…] This post was mentioned on Twitter by WordPress and Erick Aldana, Re-CycledAir. Re-CycledAir said: How to create your own WordPress Dashboard Widgets – http://fwds.me/2x […]
Hello. See my [url= ]site[/url] , [url= ]site1[/url], [url= ]site2[/url], [url= ]site3[/url], [url= ]site4[/url], [url= ]site5[/url]
great tutorial, i have added this feature to my latest plugin, so owners of the plugin can see if there is an update available.
see the plugin here:
http://www.extension103.com/plugins/updates/quick-site-plugin/
Thanks for the tutorial. one improvment could be to explain how to retrieve the rest of the feed content, ie title, date.
in your code it is just left blank.
I agree with this suggestion. Here’s the solution for anyone that needs it:
In line 36 of the function (see first code block above) you should see an echo string.
Replace this with:
echo ”.$item->get_date(‘Y-m-d’).’ | get_permalink().’>’.$item->get_title().’
‘.$content.’ – get_permalink().'”>Read full article
‘;
I was able to work this out using this additional example: http://wpti.ps/functions/make-latest-news-dashboard-widget/
Further detail can be found in the WordPress codex: http://codex.wordpress.org/Dashboard_Widgets_API#Aggregating_RSS_feeds_in_the_dashboard
The above code didn’t paste correctly.
The correct code can be found here on pastebin: http://pastebin.com/2JjYW9YY
[…] SOON …] WordPress Dashboard Widget Tutorial | Re-Cycled Air Dashboard Support Widgets | WordPress Theming WordPress Plugin Support […]
This works great. I integrated this code with another code snippet that forces the RSS widget to the side (right column) of the dashboard.
To achieve this I copied the contents of the above function (between the first “{” and last “}”) and in this code snippet: http://wordpress.stackexchange.com/a/4697
…I pasted it where it reads “// widget content goes here”.
Reducing your exposure to these toxic compounds can improve your well-being.
Repeat until you get a relatively dome-shaped center of the hat.
You don’t waste ingredients since you don’t have to fill an entire blender,
and thus save yourself the hassle of cleaning the whole thing.
There is no wonder why this blender is getting so much
fame worldwide, considering its advantages like:. The investment in your
health begins with eating 5 portions of fruits and vegetables daily, and often we just don’t
have time to do this. In recent years I’ve tried hard to avoid purchasing kitchen appliances or
gadgets with singular functions or those whose functions can be
completed by appliances or gadgets I already have. Survives
well in a green house in colder climates and give to us the diversity
like no other. Wash it off with cold water after 15 minutes and stand in front of
the mirror to admire a refreshed, well-moisturized face.
The result is finer and much more emulsified than with the 4500 Blender.
Now I start rotating a few points on one end of each side so that it matches the angle of the
hat side. An average hobbyist seeking to create some art for fun, to
enhance media, or to modify their favorite games is likely to
be turned away by such suites as XSI Softimage, a prevalent
software package used by many professional companies, which sells for a very professional price of about $2,995 USD.
Food processors: We understand that it might be quite difficult and time consuming if we chop our vegetables,
mixing and kneading dough, shredding or pureeing using our own
hand. Another issue comes with the height of the blender jar which can be a problem if
your kitchen cabinet is small. In a world of high tech cooking gadgets like digital refrigerators, coffee
pots that grind the beans and froths the milk as you brew, water ovens that allow you to
cook like a gourmet chef, it is extremely difficult to find
a product that hasn’t been done again and again ‘ and yet
again, without significant, if any, improvement.
In short, when shopping for a blender, extensively consult blender reviews and make serious considerations to
what you intend to use the blender for this will help you
make the right choices and buy the best blender there is.