Prior to WordPress 3, if you wanted custom menus you had to code them yourself. This generally involved editing your theme’s header.php file, knowledge of HTML, CSS, PHP, and probably SQL too. Unsuprisingly, easy custom menus was a highly requested feature for WordPress 3 and it was delivered.
Unfortunately, most themes don’t have support for custom menus yet. Wordpress makes it easy to add them as widgets, but if you want real menus, they need to be enabled in your theme.
Step 1: Enable Custom Menus
The first thing that you need to do in order to get custom menus working in WordPress 3 is enable them. To do that, open up your theme’s functions.php file, and drop in the following code.
1 2 3 4 | function register_custom_menu() { register_nav_menu('custom_menu', __('Custom Menu')); } add_action('init', 'register_custom_menu'); |
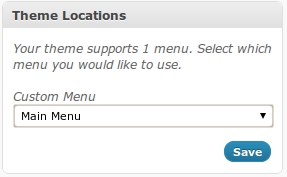
Once you have done that, go to Appearance -> Menus and you should see something like this.
Step 2: Add the Menu to Your Theme
Assuming that you’ve created a custom menu and want to display it, you’ll need to add the display function to your theme. In most cases, you’ll need to open up the header.php file, and the area that looks like a menu. This changes for every theme, but it should be fairly obvious. Once you find it, insert the following code.
1 | <?php wp_nav_menu(array('menu' => 'custom_menu')); ?> |
After that, you’re menu should display in your navigation bar. Good luck!
