As with any new web framework, getting started can seem daunting. Even though Django has some of best documentation of any framework, it can still be a pain to figure out how things work. The goal of this post is to help you, the Django newcomer, get up an running with a simple blog.
Step 1: Your Environment
One thing that isn’t clearly stated in most tutorials is that how you set up your environment can either make or break your Django experience. To make your Django experience as easy as possible, you’ll need to make sure that you have two packages installed: virtualenv and virtualenvwrapper
Virtualenv can be installed using pip, and virtualenvwrapper can be installed by following the instructions on it’s site. Once you have both of these installed, you’re going to create something called a virtual environment. A virtual environment allows you to install any packages you need for your Django development without having it interfere with the rest of your system. It also allows you to create a requirements file, which allows other people to replicate your environment. To get started, we use the mkvirtualenv command.
mkvirtualenv myblog
If you at some point close your terminal window and want to load your virtual environment again you can use the workon command.
workon myblog
If by chance you don’t want to work on this environment any more, you use the deactivate command.
deactivate
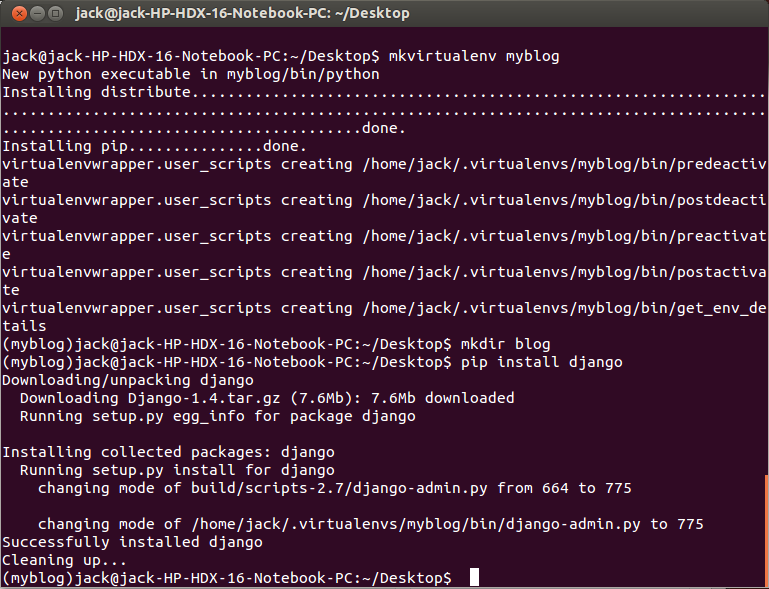
So bringing it all together, we’re going to create an environment, create a directory to play around in, and then install django.
cd ~/Desktop
mkvirtualenv myblog
mkdir blog
pip install django
Step 2: Create a Django Project
Now that we have our environment set up we need to create our first project. We’re going to call it “blog”.
cd blog
django-admin.py startproject blog .
If you look in the blog directory now, you’ll see two things: a folder named blog and a file named manage.py. The manage.py file is used to administer your project. Using it you’ll sync model changes, run the server, and collect static assets. So why don’t we try running the server?
chmod +x manage.py
./manage.py runserver
The first line allows the file to be executed, and the second line starts the server. Once the second line is executed you should see the following:
(myblog)jack@jack-HP-HDX-16-Notebook-PC:~/Desktop/blog$ chmod +x manage.py
(myblog)jack@jack-HP-HDX-16-Notebook-PC:~/Desktop/blog$ ./manage.py runserver
Validating models...

0 errors found
Django version 1.4, using settings 'blog.settings'
Development server is running at http://127.0.0.1:8000/
Quit the server with CONTROL-C.
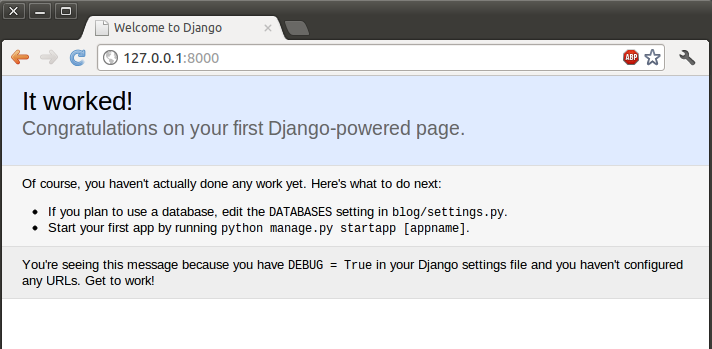
Once your development server is running, any changes you make to your files will be noticed and served automatically. If you check out the address that the server is running at, you should see this:

Step 3: Configuring a database
If we’re going to create a blog, we need to be able to store information. To do that, and database is required. In the newly create blog folder, there is a file called settings.py. That file is where we configure our server and add any apps we create. First things first though, we need a database. The Django ORM does a great job of abstracting out the database layer for us, so we can plug in basically any database that we want. For the sake of simplicity, we’re going to use SQLite. To create a SQLite database, make sure that you have the SQLite3 package installed on your operating system. Make sure you are in the same folder as the settings.py file, and then execute the following commands:
sqlite3 blog.db
sqlite> .tables #Look ma, no tables in here!
sqlite> .q #quit
Now that you have a database configured, you can crack open the settings.py file and change this bit of code:
DATABASES = {
    'default': {
        'ENGINE': 'django.db.backends.',
        'NAME': '',
        'USER': '',
        'PASSWORD': '',
        'HOST': '',
        'PORT': '',
    }
} |
DATABASES = {
'default': {
'ENGINE': 'django.db.backends.',
'NAME': '',
'USER': '',
'PASSWORD': '',
'HOST': '',
'PORT': '',
}
}
to this:
DATABASES = {
    'default': {
        'ENGINE': 'django.db.backends.sqlite3',
        'NAME': 'blog.db',
        'USER': '',
        'PASSWORD': '',
        'HOST': '',
        'PORT': '',
    }
} |
DATABASES = {
'default': {
'ENGINE': 'django.db.backends.sqlite3',
'NAME': 'blog.db',
'USER': '',
'PASSWORD': '',
'HOST': '',
'PORT': '',
}
}
Now that your Django project knows about your database, you need to have it create some tables for you. Go back to the directory with manage.py in it and run:
./manage.py syncdb
Once you run syncdb, you’ll get some output that looks like this:
./manage.py syncdb
Creating tables ...
Creating table auth_permission
Creating table auth_group_permissions
Creating table auth_group
Creating table auth_user_user_permissions
Creating table auth_user_groups
Creating table auth_user
Creating table django_content_type
Creating table django_session
Creating table django_site

You just installed Django's auth system, which means you don't have any superusers defined.
Would you like to create one now? (yes/no): yes
Username (leave blank to use 'jack'):
E-mail address: jack.slingerland@gmail.com
Password:
Password (again):
Superuser created successfully.
Installing custom SQL ...
Installing indexes ...
Installed 0 object(s) from 0 fixture(s)
Step 4: The Posts App
A Django powered website consists of many smaller “apps”. For instance, a blog may have a posts app and a photo app. The idea is that things that aren’t concerned with each other (photos,posts) should be separate entities. For our blog projects we’re going to only use one app, and we’ll call it posts.
Creating an app is easy. As usual, Django does most of the work for you so you don’t get bogged down writing a bunch of tedious boilerplate code. Navigate back to the top of your Django project (the directory with manage.py in it) and do the following:
./manage.py startapp posts
If you check out your project now, you’ll see a new directory called posts. If you descend into that directory, you’ll see 4 files.
- __init__.py: Let’s Python know that this directory is a package. This has more uses, but it’s beyond the scope of this post.
- models.py: We define how our models (tables) should look and act.
- views.py: This is where we grab data from out model, massage it to our needs, and then render it to a template.
- tests.py: Unit tests go here.
Just because the app is created, doesn’t mean that Django recognizes it. You actually have to add the app to the INSTALLED_APPS section of the settings.py file. To do that, add a line to the end of the INSTALLED_APPS list.
'posts', # Don't forget the trailing comma! |
'posts', # Don't forget the trailing comma!
Step 5: The Post Model
We’re finally to the part where we get to write code! But before we dive in, we need to think about what a blog post actually is. It will generally contain content, a title, and posted on date. With that in mind, open posts/models.py in your editor and add the following:
class Post(models.Model):
	title = models.CharField(max_length=100)
	content = models.TextField()
post_date = models.DateTimeField(auto_now=True) |
class Post(models.Model):
title = models.CharField(max_length=100)
content = models.TextField()
post_date = models.DateTimeField(auto_now=True)
Once you’ve added those, save the file and then go back to manage.py and run syncdb. You should get some output that looks like:
./manage.py syncdb
Creating tables ...
Creating table posts_post
Installing custom SQL ...
Installing indexes ...
Installed 0 object(s) from 0 fixture(s)
If we hadn’t added the posts app to our settings.py file, the syncdb command wouldn’t have generated our table for us.
Step 5: The Admin
One of the best parts about Django is it’s free admin interface that you get. The admin isn’t enabled by, but it’s pretty easy to set up. First off, we need to open settings.py and uncomment two lines.
INSTALLED_APPS = (
    'django.contrib.auth',
    'django.contrib.contenttypes',
    'django.contrib.sessions',
    'django.contrib.sites',
    'django.contrib.messages',
    'django.contrib.staticfiles',
    # Uncomment the next line to enable the admin:
    'django.contrib.admin',
    # Uncomment the next line to enable admin documentation:
    'django.contrib.admindocs',
    'posts',
)
As the comments say, uncomment the lines that say “django.contrib.admin” and “django.contrib.admindocs”. The admindocs line isn’t necessary, but it’s nice for completeness. The second step is to set up the url configuration for the admin. Go to your urls.py file and make it look like this:
from django.conf.urls import patterns, include, url

from django.contrib import admin
admin.autodiscover()

urlpatterns = patterns('',

    url(r'^admin/doc/', include('django.contrib.admindocs.urls')),
    url(r'^admin/', include(admin.site.urls)),
) |
from django.conf.urls import patterns, include, url
from django.contrib import admin
admin.autodiscover()
urlpatterns = patterns('',
url(r'^admin/doc/', include('django.contrib.admindocs.urls')),
url(r'^admin/', include(admin.site.urls)),
)
Now that the admin is enabled, we need to add our model to it. In the blog app folder (same folder as models.py), create a file called admin.py and put the following in it:
from posts.models import Post
from django.contrib import admin

admin.site.register(Post) |
from posts.models import Post
from django.contrib import admin
admin.site.register(Post)
All this does is let the admin know that it can manage your model for you. Since you technically added a new app (the admin app), you’ll need to run syncdb again.
./manage.py syncdb
Creating tables ...
Creating table django_admin_log
Installing custom SQL ...
Installing indexes ...
Installed 0 object(s) from 0 fixture(s)
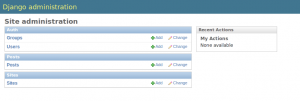
Go ahead an start the server again, and go to the admin. It should be located at http://127.0.0.1:8000/admin/. You’ll be presented with a login screen, with which you’ll use the credentials you entered in the initial setup. Once you’re logged in, you’ll see this:

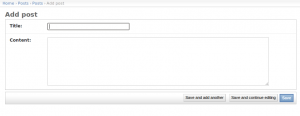
Now that you can see the Posts model in the admin, click the “add” button next to it. When you do, you’ll see a form like this.

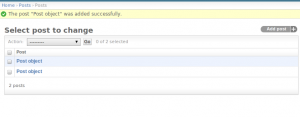
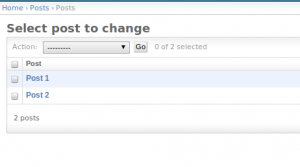
Enter a title and some content, and then click “Save and Add Another”. Enter another title a and some content, and then click “Save”. You’ll be presented with a screen with two entries on it, that both say “Post object”.

Now, “Post object” doesn’t do a very good job of describing your post. What if you want to edit it? You won’t know what is in each post until you click into it. To fix that, go to models.py and modify your Post model to look like this:
class Post(models.Model):
	title = models.CharField(max_length=100)
	content = models.TextField()
	post_date = models.DateTimeField(auto_now=True)

	def __unicode__(self):
return self.title |
class Post(models.Model):
title = models.CharField(max_length=100)
content = models.TextField()
post_date = models.DateTimeField(auto_now=True)
def __unicode__(self):
return self.title
Now when you view your post list, you’ll see the post titles instead of “Post object”.

Step 6: URLconfs
We now have a few posts in the database and can edit them in the Django admin. The next step is to set up our url structure that will allow users to view the posts on the front end of the site. Open urls.py and add the lines to it that have the “#Added” comment at the end of them.
from django.conf.urls import patterns, include, url

from django.contrib import admin
admin.autodiscover()

from posts.views import * #added

urlpatterns = patterns('',
    ('^$', home), #added
    (r'^post/(?P<post_id>\d+)/$',post_specific), #added
    url(r'^admin/doc/', include('django.contrib.admindocs.urls')),
    url(r'^admin/', include(admin.site.urls)),
) |
from django.conf.urls import patterns, include, url
from django.contrib import admin
admin.autodiscover()
from posts.views import * #added
urlpatterns = patterns('',
('^$', home), #added
(r'^post/(?P<post_id>\d+)/$',post_specific), #added
url(r'^admin/doc/', include('django.contrib.admindocs.urls')),
url(r'^admin/', include(admin.site.urls)),
)
The first line added tells Python about your views (we’ll get to them next). The 2nd and 3rd lines added specify how certain urls are handled. The 2nd added line defines your home URLconf, and the 3rd added line defined your route for specific posts. Next, open yours posts/views.py file and add the following:
from django.shortcuts import render_to_response
from django.http import Http404
from posts.models import Post

def home(request):
	return render_to_response("home.html",{
		"posts" : Post.objects.all().order_by('post_date')
	})

def post_specific(request, post_id):
	try:
		p = Post.objects.get(pk=post_id)
	except:
		raise Http404

	return render_to_response("post_specific.html",{
		"post" : p
}) |
from django.shortcuts import render_to_response
from django.http import Http404
from posts.models import Post
def home(request):
return render_to_response("home.html",{
"posts" : Post.objects.all().order_by('post_date')
})
def post_specific(request, post_id):
try:
p = Post.objects.get(pk=post_id)
except:
raise Http404
return render_to_response("post_specific.html",{
"post" : p
})
In the first few lines we import some things we’ll need:
- The ability to raise a 404 error.
- Our Post model
- A shortcut for rendering templates
The two functions we created are pretty straight forward. The home function takes all of the posts, and sends them to the “home.html” template where they will be rendered. The post_specific function checks to see if the post id that is passed in exists. If it does, it grabs that post and sends it on to the template. If it doesn’t, it raises a 404 error. Now, we need to make those templates.
Step 7: Templates
Creating templates is honestly the easiest part of the whole process. In your settings.py file, there is a variable called TEMPLATE_DIRS. You need to add the path to your templates folder in there. For instance, I created a folder called “templates” at the top level of my Django app, so mine looks like:
TEMPLATE_DIRS = (
    '/home/jack/Desktop/blog/templates',
) |
TEMPLATE_DIRS = (
'/home/jack/Desktop/blog/templates',
)
Now in your templates directory, create home.html and post_specific.html. In home.html put the following:
<html>
	<head>
		<title>All posts!</title>
	</head>
	<body>
		<ol>
			{% for p in posts %}
			<li><a href='/post/{{ p.id }}'>{{ p.title }}</a></li>
			{% endfor %}
		</ol>
	</body>
</html> |
<html>
<head>
<title>All posts!</title>
</head>
<body>
<ol>
{% for p in posts %}
<li><a href='/post/{{ p.id }}'>{{ p.title }}</a></li>
{% endfor %}
</ol>
</body>
</html>
and in post_specific.html put:
<html>
	<head>
		<title>{{ post.title }}</title>
	</head>
	<body>
		{{ post.content }}
		<p />
		<a href='/'>Back</a>
	</body>
</html> |
<html>
<head>
<title>{{ post.title }}</title>
</head>
<body>
{{ post.content }}
<p />
<a href='/'>Back</a>
</body>
</html>
Once everything is saved, go to http://127.0.0.1:8000 and check out your (simple) blog!
Next Steps
This is a very simplified tutorial. The goal is to help someone get started with something easy without getting bogged down in details. One of the greatest things about Django though is that the more details you learn, the greater it gets. With that in mind, I highly suggest checking out the following sites for more learning. Good luck!
- https://docs.djangoproject.com/en/1.4/ – The official Django documentation. Django has some of the best documentation out of any open source project, so don’t be scared of diving in. Be sure to check out the 4 part tutorial It covers some of the same things I did, but in much greater detail.
- http://www.djangobook.com/en/2.0/ – A lot of the material in the DjangoBook website is out of date, but it does a great job explaining some key concepts that are still relevant.
- http://www.reddit.com/r/django – The Django sub-Reddit is a great place to keep up with Django news and conversations.
- http://originalhaters.com/2012/07/30/mountain-lion-mamp-and-django-1-4/ – A great piece on getting Django up and running on Mountain Lion


